

In most garages, a subpanel is the recommended approach for safe, code-compliant Level 2 EV charging when you need multiple circuits, a detached structure, or future expansion. A single dedicated 240V circuit can work for a straightforward attached-garage setup with one charger. Either way, the first move is the same: schedule a professional load calculation before anyone touches your panel.
TL;DR:
- A subpanel is recommended for detached garages, multiple EV chargers, or ongoing high-current loads, while a single dedicated circuit often suffices for simple setups.
- Proper sizing of the subpanel and breaker depends on load calculations based on NEC 220 standards, not just available breaker slots or panel capacity.
- Detached garage subpanels require a four-wire feeder and a grounding electrode system, with neutral and ground kept separate at the subpanel.
- Long feeder runs over 75 feet should use larger conductors to compensate for voltage drop, and conduit allows future wire upgrades without trenching.
- Obtain permits, schedule inspections, and ensure correct grounding, neutral separation, and load calculations to prevent costly mistakes and safety hazards.
Table of Contents
- When to choose a subpanel versus a single dedicated EV circuit
- How to size the subpanel and pick breaker amperage for your EV charger
- Feeder wiring rules and grounding for garage subpanels
- Voltage drop, conductor sizing, and run-length effects
- Permits, inspections, timeline, and cost drivers for a garage subpanel install
- Common installation mistakes and a homeowner safety checklist
- Professional perspective: why call Tri-County Services Electric & Plumbing
- Choosing the correct type and rating of EV charger compatible with the subpanel capacity
- Step-by-step installation process overview for a garage subpanel dedicated to EV charging
- Maintenance tips and troubleshooting common issues with garage subpanels for EV chargers
- Our take: the biggest mistake isn’t the wiring, it’s the planning
- Book a garage subpanel or EV charger install with Tri-County Services Electric & Plumbing
- FAQ
- Sources
When to choose a subpanel versus a single dedicated EV circuit
The right answer depends on your garage, your panel, and what you expect to add later, not just today’s charger.
A single dedicated branch circuit is usually enough when you’re installing one Level 2 charger in an attached garage close to your main panel, with no plans for a second vehicle, workshop tools, or detached structure. It’s the simpler, lower-cost path.
A subpanel becomes the better long-term choice when:
- Your garage is detached from the house and needs its own power feed.
- You’re planning a second EV charger, a workshop, or a home office down the road.
- You already run multiple 240V loads, such as a welder or air compressor, alongside the charger.
- Your main panel has little or no room for new circuits.
Trenching matters here. If a feeder has to cross your yard to reach a detached garage, running it once at a slightly larger capacity avoids a second excavation project in a few years. The incremental cost of a bigger feeder today is almost always cheaper than digging up the same trench twice.
How to size the subpanel and pick breaker amperage for your EV charger
EV chargers are rated as continuous loads, which changes the math.
Most residential Level 2 chargers fall into a few common breaker sizes:
- 30A circuits for lower-output chargers (roughly 24A continuous draw).
- 40A circuits for mid-range chargers (around 32A draw), a frequent choice for home installs.
- 50A circuits for higher-output chargers (around 40A draw).
- 60A circuits for chargers pushing closer to the top of residential Level 2 output.
Pro Tip: Never assume an empty breaker slot means you have spare capacity. The only reliable way to know is a load calculation.
NEC 220 load calculations, not available breaker spaces, determine whether your existing service can handle a new continuous load like EV charging. NEC load-calculation methods show whether a 100A or 200A main service has room for the new circuit or whether a full service upgrade comes first. Residential charging is typically Level 1 or Level 2, and Level 2 setups often require a dedicated 240V circuit sized to the specific charger you plan to install.
Feeder wiring rules and grounding for garage subpanels
Garage subpanels, especially in detached structures, follow wiring rules that differ from an indoor subpanel next to your main service.
- A detached garage subpanel needs a four-wire feeder: two hots, a neutral, and a separate equipment grounding conductor. The neutral and the ground must never be bonded together at the subpanel, only at the main service.
- The detached structure needs its own grounding electrode system, commonly a pair of ground rods, with the equipment grounding conductor bonded to that electrode system.
- A disconnecting means has to be present at the detached structure so power can be shut off locally, and feeder conductors (THHN in conduit, MC, or NM depending on the run) need to match the ampacity and the installation environment.
Pro Tip: If an electrician proposes a three-wire feeder to a detached garage, that’s a red flag. Detached garage subpanels require a four-wire feeder with no neutral-ground bond and a grounding electrode system at the structure itself.
Voltage drop, conductor sizing, and run-length effects
Long feeder runs change how a circuit performs even when the breaker size is correct on paper. As current travels farther through a conductor, resistance eats into voltage, and your charger ends up delivering less power than it should.
This is a particular issue for detached garages, where feeders can run 75, 100, or more feet from the main panel. Voltage drop over long feeder runs often governs conductor sizing more than the breaker rating does, which is why electricians frequently upsize wire gauge on longer runs rather than relying on the minimum code size.
A few practical habits help avoid problems:
- Run conductors in conduit so you can upgrade wire size later without re-trenching.
- Choose a larger conductor than the bare minimum when the run exceeds roughly 75 to 100 feet.
- Resist the temptation to downsize wire just to shave trenching costs. It costs more to fix later.
- Call 811 before any digging to have underground utility lines marked.
Permits, inspections, timeline, and cost drivers for a garage subpanel install
A garage subpanel for EV charging almost always requires a permit, and skipping that step creates real problems if you ever sell the home or file an insurance claim.
The typical sequence looks like this:
- Apply for an electrical permit with your local building department before work starts.
- Pass a rough-in inspection that checks the feeder, grounding electrode system, and disconnect before walls or concrete close in around them.
- Pass a final inspection confirming the load calculation, neutral-ground separation, and labeling are correct.
Cost drivers tend to cluster around a few items: trenching length and surface type, whether a service upgrade is needed, the subpanel and breaker hardware itself, and local permit fees. Most straightforward installs move from permit application to final sign-off within a few weeks, though detached-structure projects with trenching can take longer.
Common installation mistakes and a homeowner safety checklist
Most garage subpanel problems trace back to a short list of recurring errors, and they’re exactly what inspectors look for first.
- Bonding neutral and ground at the subpanel. This should happen only at the main service. Keeping neutral and ground separate at a subpanel is a core NEC requirement, and bonding them downstream is one of the most common and most dangerous DIY mistakes.
- Undersized feeders or breakers that don’t account for the 125% continuous-load rule or the voltage drop on a long run.
- Missing disconnects or grounding electrode systems at detached structures, both of which code requires.
Pro Tip: Ask any electrician for the load calculation in writing before work begins, and ask specifically how they’ll handle grounding at a detached structure. A vague answer or a quote that skips the load calculation entirely is a red flag worth walking away from.
Professional perspective: why call Tri-County Services Electric & Plumbing
We treat a garage subpanel project the same way every time: with a real load calculation, not a glance at open breaker slots.
Before recommending a subpanel, a service upgrade, or a simple dedicated circuit, the main panel’s actual capacity is checked, grounding and neutral separation are confirmed to meet code, and every detail an inspector will check later is verified. That groundwork is what keeps a charger installation safe for years, not just functional on day one.
If you’re planning a garage subpanel for EV charging, call (440) 253-0332 for a professional assessment before you commit to a wiring plan.
Choosing the correct type and rating of EV charger compatible with the subpanel capacity
The charger you buy has to match the circuit you’re building, not the other way around. Buying a 48-amp charger and hoping your panel can absorb it later leads to expensive rework.
Start with your vehicle’s onboard charger rating. Most electric vehicles accept somewhere between 32 and 48 amps on Level 2 charging, and a charger rated well above what your car can use adds cost without adding charging speed. Once you know your vehicle’s limit, work backward to the subpanel capacity available after the load calculation.
A few practical matching points:
- A charger with a fixed amperage setting needs a circuit sized exactly for that draw, following the 125% continuous-load rule.
- An adjustable-amperage charger gives more flexibility if you might upgrade vehicles or add a second charger later, since the same circuit can serve different draw levels within its rated capacity.
- Hardwired chargers skip the plug-and-receptacle question entirely, but they still need a dedicated breaker sized to the charger’s draw.
- If your subpanel capacity is tight after the load calculation, a lower-amperage charger on a smaller breaker is often the more realistic choice than forcing a service upgrade you didn’t plan for.
This is exactly the kind of decision worth making with a professional load calculation in hand rather than guessing from a spec sheet, since the charger, the breaker, and the subpanel all have to agree with each other and with your actual vehicle.
Step-by-step installation process overview for a garage subpanel dedicated to EV charging
A garage subpanel project for EV charging generally follows a consistent sequence from first call to final inspection.
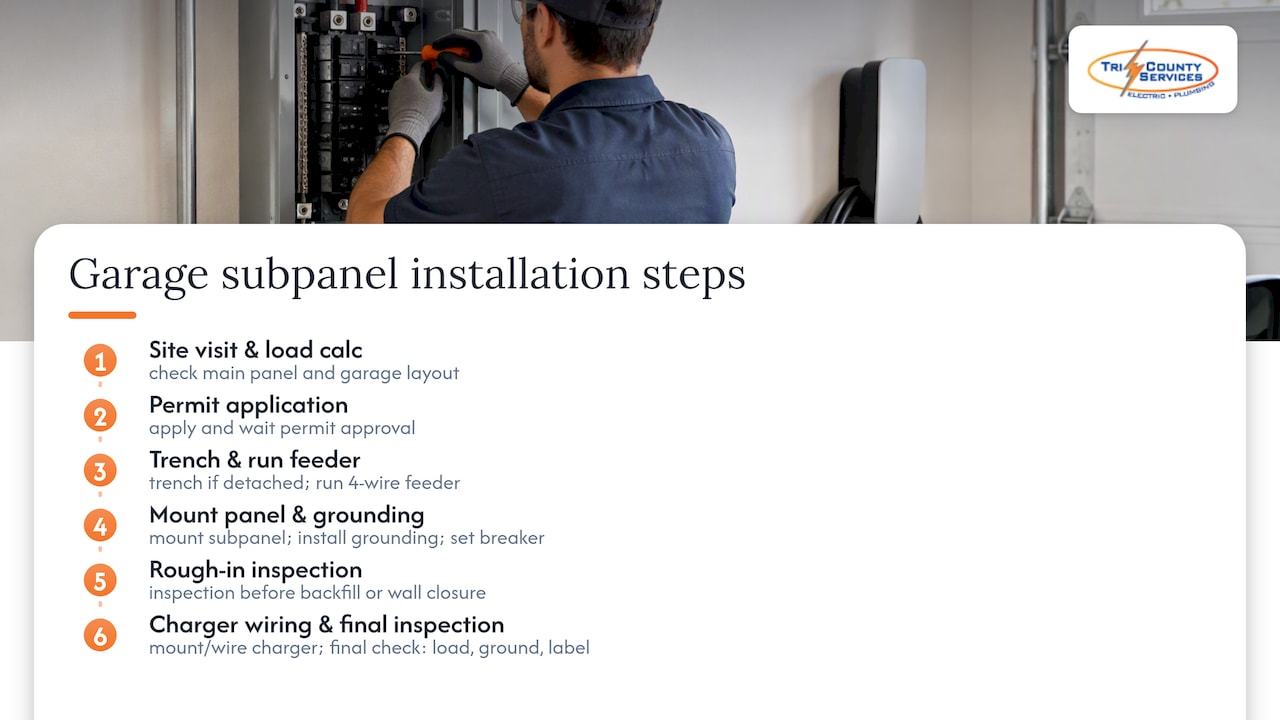
It starts with a site visit and load calculation, where a technician checks your main panel’s existing capacity, reviews your garage layout, and determines whether a subpanel, a dedicated circuit, or a service upgrade fits your situation using NEC 220 load-calculation methods.
Next comes permit application with your local building department, which has to happen before any wiring work begins. Once the permit is approved, the physical work follows: trenching if the garage is detached, running the four-wire feeder, mounting the subpanel, installing the grounding electrode system, and setting the dedicated breaker for the charger.
A rough-in inspection typically happens before any trench is backfilled or wall is closed, confirming the feeder, grounding, and disconnect are correct. After that, the charger itself gets mounted and wired in, and the system goes through a final inspection that checks the load calculation on file, neutral-ground separation, and proper labeling.
The entire sequence, from first site visit to final sign-off, usually spans a few weeks depending on permit processing times and whether trenching is involved. Level 2 EV charging installations commonly require permits and professional installation, which is part of why the process has more steps than simply plugging in a charger.
Maintenance tips and troubleshooting common issues with garage subpanels for EV chargers
A correctly installed garage subpanel needs little ongoing attention, but a few checks help catch problems early.
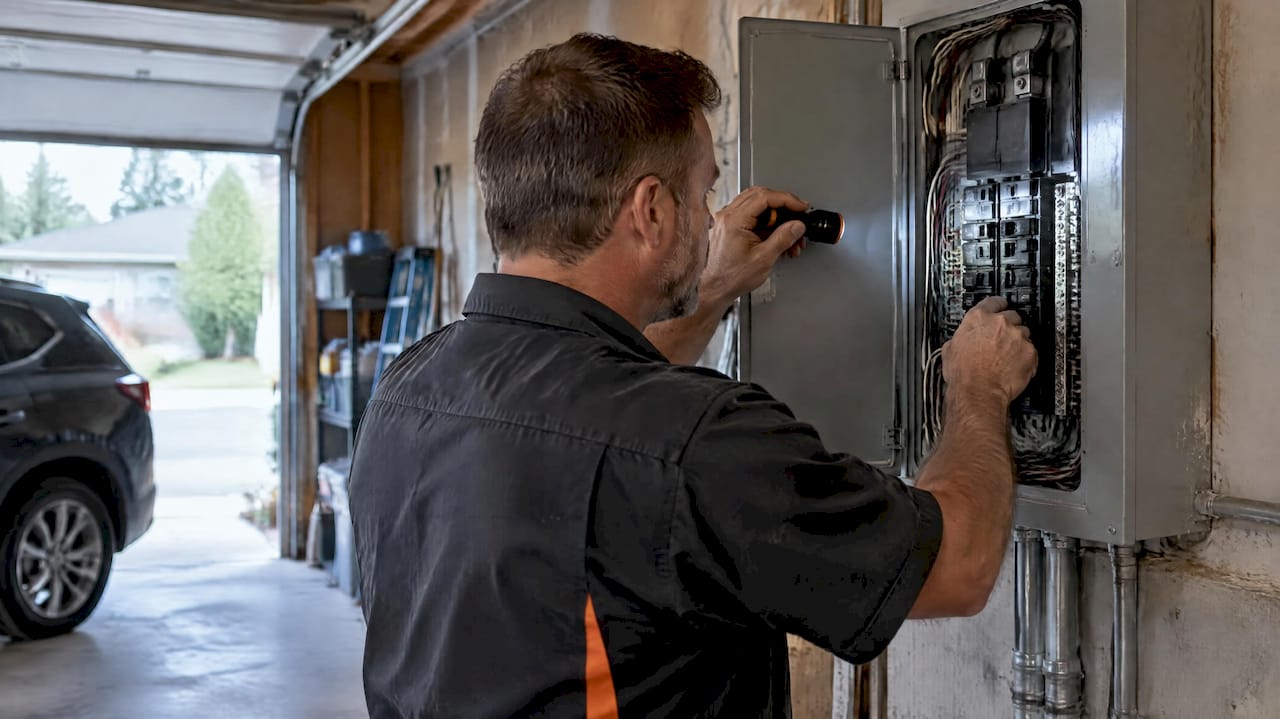
Visually inspect the subpanel every few months for signs of corrosion, moisture intrusion, or loose connections, especially if the panel sits in a detached garage exposed to temperature swings. A breaker that trips repeatedly during charging is a signal worth taking seriously rather than simply resetting and ignoring: it can point to an undersized circuit, a loose connection, or a charger pulling more current than the circuit was designed for.
Slower-than-expected charging speeds often trace back to voltage drop on a long feeder run, particularly in detached garages where the subpanel sits far from the main service. If charging times stretch out over several months without an obvious cause, that’s worth a professional look rather than assuming the charger itself has failed.
Keep the area around the subpanel clear and dry, and never store flammable materials directly against it. If you ever notice a burning smell, discoloration around the breaker, or a buzzing sound, shut off the circuit and call a professional immediately rather than troubleshooting it yourself. Electrical issues at a subpanel feeding a high-draw EV charger carry real fire and shock risk, and diagnosing them safely requires someone who can test the circuit under load.
Our take: the biggest mistake isn’t the wiring, it’s the planning
What gets far less attention is the planning failure that causes most of the expensive redos: homeowners sizing a subpanel for today’s single charger instead of tomorrow’s second vehicle or workshop addition.
Conventional advice tends to frame this as a wiring problem. It’s really a forecasting problem. A feeder run once at a slightly larger capacity costs a fraction more than running it twice, yet most quotes are built around the smallest system that satisfies today’s single charger.
If you take one thing from everything above, make it this: get the load calculation before you get a quote, and ask explicitly whether the proposed feeder size accounts for anything you might add in the next five years. That one question does more to prevent regret than any amount of wire-gauge research.
— Lindsay Paramore
Book a garage subpanel or EV charger install with Tri-County Services Electric & Plumbing
We handle electrical panel upgrades, EV charger installation, and dedicated circuit or subpanel builds for garages.

A typical service visit starts with a professional inspection and load calculation, following the step-by-step installation process overview for a garage subpanel, includes permit paperwork handled directly, proceeds through the installation, and finishes with the final inspection. A single point of contact is provided throughout the entire process to simplify coordination.
Call us at (440) 253-0332 or check our EV charger installation page and electrical pricing guide to see what a garage subpanel project involves for your home.
FAQ
Do I need a 50 or 60 amp circuit breaker for an EV charger?
A professional load calculation confirms the exact size for your specific charger and panel.
How much does it cost to install a 240V outlet in a garage for an EV charger?
Costs vary based on panel capacity, run length, and whether trenching is involved, so there’s no single published figure that fits every garage. For related electrical work, electrical troubleshooting runs $300 to $500 as a point of reference, and a full quote requires an on-site assessment.
Can a 100 amp main panel handle an EV charger?
It depends entirely on your home’s existing load. NEC 220 load-calculation methods determine whether a 100-amp service has room for an EV charger or whether a service upgrade comes first, since available breaker slots alone don’t indicate available capacity.
Can an EV charger be connected to a garage consumer unit?
Yes, a garage subpanel can feed an EV charger as long as it’s sized correctly and wired to code. Detached garage subpanels require a four-wire feeder, their own grounding electrode system, and no neutral-ground bond, which a professional installation confirms during rough-in and final inspection.
Sources
These sources cover the NEC requirements and technical details referenced throughout this guide. Local code adoption varies, so always confirm current requirements with your authority having jurisdiction before starting a project.
- EV Charger in a Detached Garage: What It Takes | WattSimple
- BENEFIT Factsheet: Home Electrification and Electric Panel Upgrades
- Charging electric vehicles at home | AFDC