

Shut the water off, make the area safe, and apply a temporary seal, then plan a permanent repair or call a professional. If the leak sits anywhere near an outlet, panel, or light fixture, cut power at the breaker before you touch anything. Epoxy putty, self-fusing tape, or a repair clamp will buy you time, but treat every one of these as a stopgap. Most pipe leak repair situations still need a permanent fix, and some need a professional the same day.
TL;DR:
- Temporary fixes like epoxy putty, self-fusing tape, and repair clamps can control small leaks but are only stopgaps, not long-term solutions.
- Turning off the main shut-off valve and draining pressure are crucial first steps, especially if the leak is near electrical outlets or wiring inside walls.
- Full pipe repairs require cutting out damaged sections and installing appropriate fittings like push-to-connect or crimped sections, not just sealing the leak.
- Professional intervention is necessary for hidden leaks, multiple pinholes caused by corrosion, or leaks near gas lines and electrical panels to prevent safety hazards.
- Regular inspections, proper insulation, and pressure regulation help prevent leaks, especially in older homes with galvanized pipes or exposed water lines.
Table of Contents
- What Are the First Emergency Steps for a Pipe Leak?
- Which Temporary Fixes Actually Stop a Pipe Leak?
- How Do You Permanently Fix a Leaking Pipe?
- What Tools and Supplies Do You Need on Hand?
- How Do You Test a Pipe Repair After Fixing It?
- When Should You Call a Professional Instead?
- Tri-County Services Electric & Plumbing’s Approach to Leak Response
- Can a Pipe Leak Make You Sick?
- How Can You Prevent Pipe Leaks Before They Start?
- Author Perspective: Balancing DIY Fixes With Professional Help
- Get Emergency Leak Repair From Tri-County Services Electric & Plumbing
- Sources
- FAQ
What Are the First Emergency Steps for a Pipe Leak?
Speed matters more than precision in the first five minutes. Find the fixture shut-off under the sink or behind the toilet first. If the leak is upstream of any single shut-off, or you can’t isolate it, go straight to the home’s main shut-off valve, usually near the water meter or where the supply line enters the house. Turning that single valve clockwise stops everything downstream.
Once the water’s off, drain the remaining pressure before you attempt anything. Open the highest faucet in the house and the lowest one (often a basement laundry tub or outdoor spigot) at the same time. That lets air in at the top and water drain out at the bottom, which keeps the pipe from spitting water back at you while you work.
- Locate and test your main shut-off valve now, not during the emergency, so you’re not hunting for it with an inch of water on the floor.
- Never touch standing water or a wet wall near outlets, switches, or a panel; shut off the breaker for that area or the main breaker if you’re unsure which circuit is affected.
- If the leak is inside a wall near wiring, stop and call a professional. This is one situation where guessing costs more than a service call.
Which Temporary Fixes Actually Stop a Pipe Leak?
Not every temporary fix suits every leak. Pick the one that matches the damage, not whichever product happens to be in your garage.
- Epoxy putty. Cut a piece, knead it between your fingers until the color turns uniform (that’s how you know the two parts are mixed), then press it firmly around the leak and smooth the edges. Cure times typically run 20 to 60 minutes depending on the product, and it works best on small pinholes or hairline cracks in spots too tight for a clamp.
- Self-fusing silicone tape or pipe wrap. Stretch it hard as you wrap, overlapping each layer by about half its width. It bonds to itself rather than the pipe, so it holds up better on joints and curved fittings than ordinary tape does, and it’s a solid choice for low to medium pressure lines.
- Repair clamps and rubber patch kits. For a straight run of pipe with a visible split, a rubber patch under a metal clamp beats putty because it can handle more pressure. Size the clamp to the pipe diameter and tighten evenly on both sides so the rubber compresses flat.
Before any of these go on, shut off the water and dry the area completely. Epoxy and tape won’t bond to a wet or dirty surface, and none of these fixes are rated for the long haul on a home’s potable water supply.
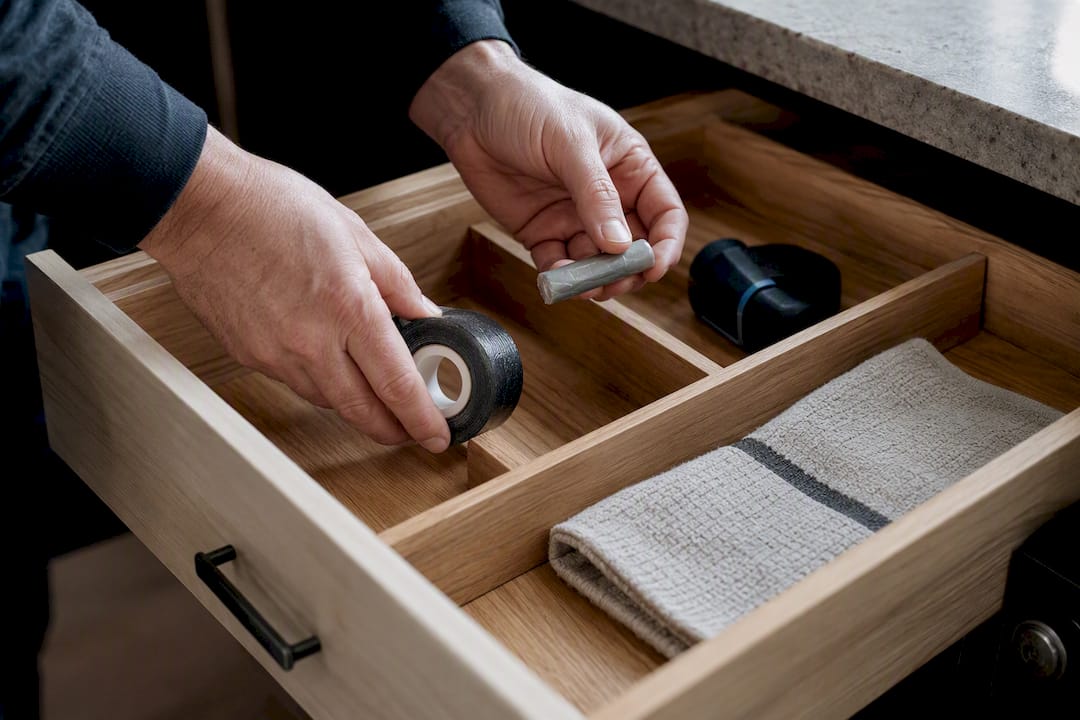
Pro Tip: Keep a tube of epoxy putty and a roll of self-fusing tape in a kitchen drawer, not the garage. When a pipe fails, you won’t want to go searching through bins in the cold.
How Do You Permanently Fix a Leaking Pipe?
A permanent pipe leak repair means removing the damaged section, not just covering it. The general workflow is the same across most materials: drain the line, cut out the bad section with a clean, square cut, deburr both ends, measure the replacement piece, install the fitting, secure it, then pressurize slowly and watch for drips.
- Push-to-connect fittings (like SharkBite) work well as a lasting fix for a single copper pinhole leak. Cut out the damaged inch or two, deburr the ends, and push the fitting on. For anything more than one isolated hole, a full section replacement holds up better long-term.
- PEX repairs call for a proper crimper and a go/no-go gauge to confirm the ring seated correctly. If the pipe itself is fine and only the fitting failed, re-crimping is enough. If the pipe is compromised, replace the section.
- PVC and CPVC solvent welding demands a fully dry pipe. Any moisture in the joint keeps the cement from bonding, so wipe and let it air dry before applying primer, then cement, in one confident motion. This is where inexperienced DIYers run into trouble. Rushed joints often leak again within days.
Corrosion changes the math entirely. If you’re seeing multiple pinholes across the same run of copper, patching each one individually is a losing game. A full repipe, often to PEX, is the more durable answer. Always deburr cut ends before installing any push-to-connect fitting; a rough edge can nick the internal O-ring and cause a new leak right where you just fixed the old one.
What Tools and Supplies Do You Need on Hand?
A basic pipe leak repair kit costs less than a service call, but only if you already own the right tools. Here’s what most DIY repairs actually require:
- Tubing or pipe cutter and a deburring tool
- PEX crimper with a go/no-go gauge (if your home runs PEX)
- Adjustable wrench and channel locks
- Plumber’s tape, fine sandpaper, work gloves, and eye protection
- Epoxy putty, self-fusing tape, a repair clamp kit, and a slip coupling or two on the shelf for emergencies
Basic repair kits like clamps and putty typically run $10 to $25, but buying the specialty tools for a proper permanent fix can push total DIY costs to $50 to $150 once you factor in a crimper or a decent pipe cutter. Weigh that against a single professional visit before deciding whether owning the tools makes sense for a one-time repair.
How Do You Test a Pipe Repair After Fixing It?
Don’t crank the main valve back open all the way. Turn it slowly and listen.
- Restore water pressure gradually, watching the repaired joint or patch the entire time for any sign of weeping or dripping.
- Check your water meter after 15 to 20 minutes with no fixtures running. If the dial is still moving, you have a slow leak somewhere, possibly not even at the spot you just fixed.
- Run a dry paper towel along every seam and fitting nearby. Any dampness on the towel means the joint isn’t sealed.
- If you suspect moisture got into a wall or floor cavity, a moisture meter or a quick camera inspection can confirm it before you close anything back up.
Dry the area completely afterward, wipe down any tools that got wet, and check surrounding drywall or subfloor over the next day or two. Standing moisture that lingers more than 24 to 48 hours is a job for a restoration specialist, not a mop.
When Should You Call a Professional Instead?
Some leaks are DIY-friendly. Others are a liability the moment you touch them. Call a professional when you’re dealing with:
- A hidden leak behind a wall, under a slab, or inside a ceiling, since finding it usually means damaging finished surfaces without the right equipment.
- A leak on the main water line or anywhere near a gas line or electrical panel.
- Multiple pinhole leaks on the same pipe run, which usually signals corrosion that a single patch won’t solve.
- Visible water damage that’s spreading, discoloring drywall, or showing up on a lower floor.
Professionals use acoustic sensors, thermal imaging, and camera inspection to find hidden leaks without tearing open walls, which limits the damage and gives you documentation an insurance adjuster will actually accept. Calling early, before a slow leak becomes a soaked subfloor, almost always costs less than waiting.
Tri-County Services Electric & Plumbing’s Approach to Leak Response
Tri-County Services has worked in Northeast Ohio homes since 1975, and that history shapes how we handle a leak call. Our technicians run a safety-first check before touching anything, especially when water is anywhere near wiring, then inspect the source and walk you through a written estimate before starting repairs. You get plumbing leak detection and repair built around finding the actual source, not just patching the symptom.
Can a Pipe Leak Make You Sick?
A leak left alone for more than 24 to 48 hours creates the exact conditions mold needs: moisture, warmth, and a food source like drywall paper or wood framing. Mold doesn’t need a flood to take hold. A slow drip behind a cabinet or inside a wall cavity is often enough, and it can grow for weeks before you ever see a stain or smell anything.

Once mold establishes itself, it releases spores that trigger real health effects in a lot of people. Common symptoms include coughing, sinus congestion, throat irritation, and itchy or watery eyes. Anyone with asthma, allergies, or a compromised immune system tends to react faster and more severely, and infants and older adults are more vulnerable too.
There’s a secondary risk that gets less attention: standing water from a pipe leak can also become a breeding ground for bacteria, particularly if it’s mixing with anything from a drain line or sitting stagnant in a crawl space. That’s a different problem than mold, but it carries its own set of respiratory and skin irritation risks.
The practical takeaway is timing. The faster you stop a leak and dry the affected area, the smaller the window mold has to establish itself. If you already see fuzzy growth, discoloration spreading across drywall, or smell a persistent musty odor, that’s no longer a simple pipe leak repair. Cleanup at that point usually calls for a remediation specialist in addition to fixing the pipe itself, since scrubbing visible mold without addressing the moisture source just invites it back.
How Can You Prevent Pipe Leaks Before They Start?
Most pipe leaks aren’t random. They’re the end result of a slow process you could have caught months earlier.
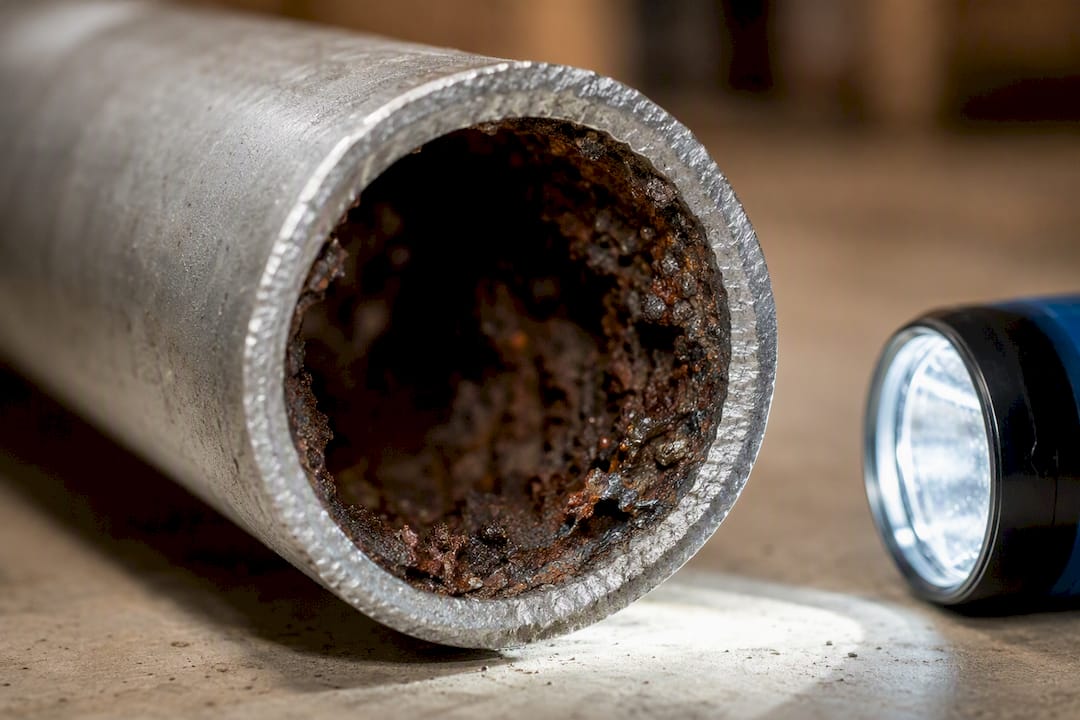
Corrosion is the biggest culprit in older homes, especially those with original galvanized steel supply lines. Galvanized pipe corrodes from the inside out, so a pipe can look fine on the outside while it’s paper thin internally. If your home was built before the 1960s and still has its original supply lines, that’s worth a professional evaluation regardless of whether you’ve had a leak yet.
Water pressure that runs consistently above 80 psi stresses joints and fittings over time, which is why a pressure-reducing valve pays for itself in avoided repairs. Temperature swings matter too. Any exposed pipe in an unheated garage, crawl space, or exterior wall needs insulation before winter, since a single hard freeze can split a pipe that’s held up fine for years.
A few habits catch small problems before they become emergencies:
- Check under every sink and behind every toilet every few months for slow drips, mineral buildup, or discoloration on the pipe itself.
- Know the water pressure coming into your home, and install a reducing valve if it’s running high.
- Insulate exposed pipes before the first freeze each year, not after a pipe already burst.
- Watch your water bill. A quiet jump with no obvious explanation is often the first sign of a leak you haven’t found yet.
- Schedule a periodic plumbing inspection, particularly if your home has galvanized or original 1970s-era copper supply lines.
Author Perspective: Balancing DIY Fixes With Professional Help
A small, visible pinhole leak on an accessible pipe is a fair DIY project. What changes my recommendation fast is anything hidden behind a wall or anywhere near wiring. That’s not caution for its own sake. It’s where a fixable problem turns into a dangerous one. When you’re unsure, call someone before you touch it.
— Lindsay Paramore
Get Emergency Leak Repair From Tri-County Services Electric & Plumbing
A tube of epoxy putty buys you an hour, not a solution. Tri-County Services Electric & Plumbing gives Northeast Ohio homeowners a faster path from “I found a leak” to “it’s actually fixed,” with technicians who diagnose the real source instead of guessing at it. We handle everything from a single pinhole on a copper line to a failing water line that needs full replacement.

Our team responds to emergency leak repairs and handles water line installation and repair when a section of pipe is too far gone for a patch. If you’re not sure whether your leak is a five-minute fix or a bigger issue, call (440) 253-0332 and we’ll walk you through it over the phone before we ever schedule a visit.
Sources
- How to fix PVC pipe leaks with epoxy molding putty (Loctite)
- How to fix leaking pipes (Lowe’s)
- How to Repair a Copper Pinhole Leak (SharkBite)
FAQ
What Is the Best Way to Fix a Leaking Pipe?
For a small, accessible leak, shut off the water, dry the area, and apply epoxy putty or a repair clamp as a temporary measure. Then schedule a permanent fix, since temporary patches are meant to hold only until a lasting repair or professional visit.
Does Flex Seal Really Stop Water Leaks?
Spray sealants and similar products can slow a very minor leak temporarily, but they’re not rated for potable water lines under normal household pressure. Treat any spray sealant the same as tape or putty: an emergency measure only, not a repair you leave in place.
How Do You Seal a Leaking Water Pipe Without Replacing It?
Self-fusing silicone tape or a repair clamp with a rubber patch can seal a leak without cutting into the pipe, and both hold up reasonably well on straight runs. Neither is a permanent fix, so plan on a proper repair once the immediate emergency is handled.
What Can You Put on a Pipe to Stop a Leak?
Epoxy putty, self-fusing tape, and mechanical repair clamps are the three most reliable temporary options, chosen based on the leak’s size, location, and the pipe’s shape. Tri-County Services Electric & Plumbing can advise which option fits your situation if you call before applying anything.
When Should I Stop Trying to Fix a Pipe Myself?
Stop and call a professional the moment a leak is hidden inside a wall, near electrical wiring or a gas line, or shows up as multiple pinholes on the same pipe. Those situations usually point to corrosion or damage a surface patch can’t solve.