

TL;DR:
- Setting your residential pressure reducing valve to 50 PSI aligns with EPA recommendations of 45 to 60 PSI for safety and appliance longevity. When water pressure exceeds standard limits, a PRV is necessary to prevent hidden plumbing damage over time. Professionals can diagnose and replace aging valves or those showing signs of corrosion, leaks, or internal failures for optimal system performance.
Set your residential PRV to 50 PSI as a starting point. The EPA WaterSense program recommends keeping household water pressure between 45 and 60 PSI to protect fixtures, extend appliance life, and stay within the range most U.S. plumbing codes recognize as safe. When incoming water pressure exceeds typical plumbing code limits, a PRV is generally required, as sustained high pressure can cause hidden damage to plumbing components over time.
A pressure reducing valve (PRV) is a spring-loaded device installed on your main supply line that automatically reduces incoming municipal pressure to a safe, steady downstream level. Unlike partially closing a shutoff valve, a PRV dynamically adjusts to changing demand throughout the day.
Quick TL;DR checklist:
- Measure static pressure at a hose bib with a gauge
- Compare to the 45–60 PSI target range
- Adjust in small increments, re-test under flow
- Call a professional plumber if you find leaks, corrosion, or unknown valve types
Table of Contents
- When should you stop and call a professional plumber?
- What tools and pre-checks do you need before adjusting a PRV?
- How to adjust a residential PRV step by step
- How do you measure water pressure correctly?
- What do common PRV problems look like after adjustment?
- How do you maintain a PRV and know when to replace it?
- What does a professional plumber actually do for PRV work?
- Key Takeaways
- The part most guides skip
- Tri-County Services Electric & Plumbing handles PRV work in Northeast Ohio
- Useful sources
- FAQ
When should you stop and call a professional plumber?
Before touching your PRV, be honest about what you are walking into. Most homeowners who end up calling Tri-County Services Electric & Plumbing did not start with a broken valve. They started with a small adjustment that revealed a bigger problem underneath.
Stop and call a pro if any of these apply:
- You cannot identify the valve type or find no adjustment screw
- The valve shows visible corrosion, mineral buildup, or active leaking
- Inlet pressure is far above your target (a ratio greater than 3:1 inlet to outlet puts the valve at risk of cavitation and instability, per Caleffi’s installation guidance)
- The valve is buried, in a crawl space, or otherwise inaccessible
- You have a closed plumbing system (PRV plus a backflow preventer) and no thermal expansion tank — pressure can spike dangerously after adjustment
- You are unsure how to locate your main water shutoff valve before starting
Safety steps before any adjustment attempt:
- Shut off the main water supply
- Open a downstream faucet to relieve line pressure
- Check for electrical panels or wiring near the valve location — water and electricity share tight spaces in many mechanical rooms
Pro Tip: The single most common DIY mistake is partially closing the main shutoff valve to reduce pressure. This damages the valve and does nothing to regulate pressure under changing flow conditions. A PRV is the correct tool for the job.
What tools and pre-checks do you need before adjusting a PRV?
Arriving at the valve without the right tools means a second trip or a guessed adjustment. Gather these before you start:
- Water pressure gauge with a hose bib adapter (0–200 PSI range)
- Adjustable wrench for the lock nut
- Flathead or Phillips screwdriver for the adjustment screw
- Flashlight if the valve is in a utility room or crawl space
- Pen and paper to record your baseline readings
Pre-check checklist:
- Locate the PRV. It typically sits on the main supply line just after the meter, often near the water heater. Look for a bell-shaped or dome-shaped fitting with a screw on top.
- Confirm the flow direction arrow on the valve body points toward the house.
- Check whether an existing pressure gauge is already installed downstream. If so, note its current reading before touching anything.
- Inspect the valve body for cracks, mineral deposits, or weeping water. Any of these is a reason to check whether you need emergency plumbing service before proceeding.
- Identify the adjustment screw and lock nut. On most residential direct-acting PRVs, the lock nut sits just below the adjustment screw on top of the valve.
Pro Tip: Attach your gauge to a first-floor hose bib or washing machine cold-water inlet for the most representative baseline reading. Upper-floor fixtures read slightly lower due to elevation; basement readings run slightly higher.
Also worth reviewing before you start: the 3 things to check before calling a plumber — a short pre-call checklist that can save you time and money.
How to adjust a residential PRV step by step
This procedure applies to a standard direct-acting residential PRV. Watts’ adjustment instructions confirm the same basic method: attach a gauge, note the reading, then turn the adjustment screw.
- Shut off the main water supply — and open a faucet to drain residual pressure from the line.
Manufacturer caution: Never adjust the valve beyond the outlet pressure range stamped on the nameplate. Some models, including certain fixed-angle designs, are not field-adjustable at all. If you cannot find an adjustment screw or the valve body shows no top-mounted fitting, the valve may have a fixed factory setting and requires replacement rather than adjustment.
Some Tomson-brand PRVs, for example, ship with factory settings around 350–500 kPa (roughly 50–72 PSI) and use a top-screw reset method. Always confirm your specific model before adjusting.
How do you measure water pressure correctly?
Getting a reliable reading is not complicated, but the conditions matter. A gauge attached to the wrong fixture or read at the wrong moment gives you a number that leads to a bad adjustment.
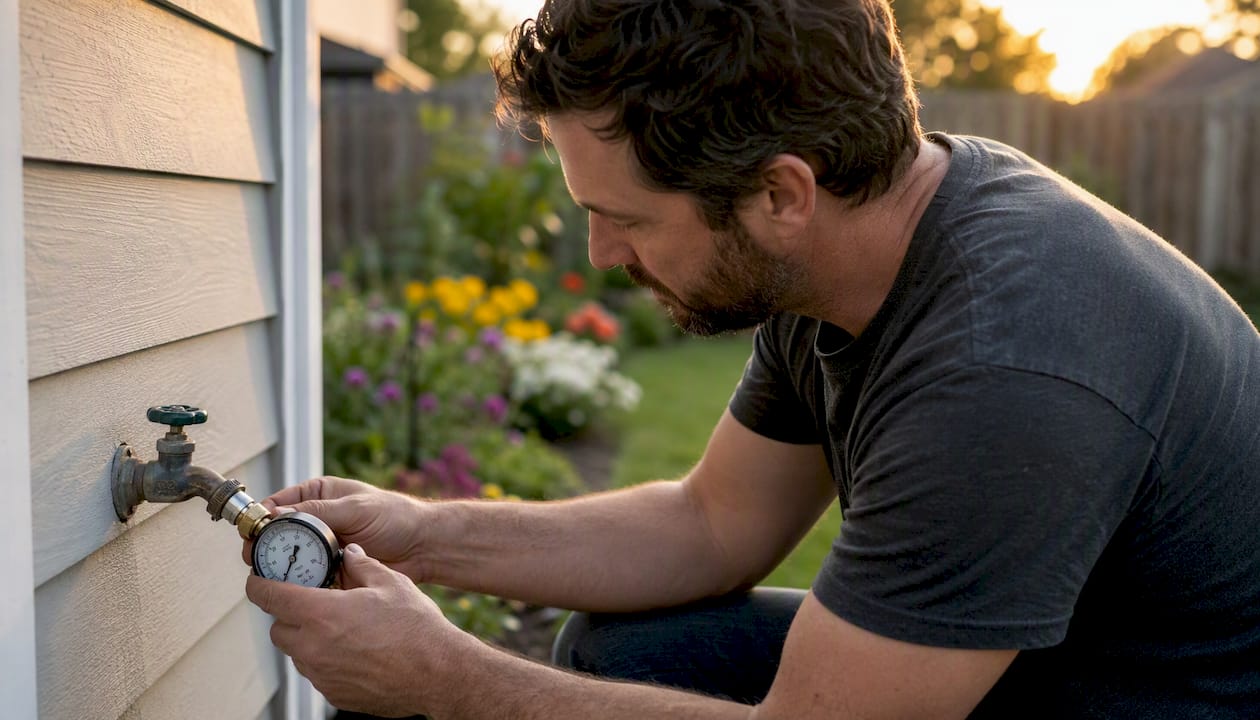
Static pressure is measured with no water running anywhere in the house. It is the highest reading you will see and represents the PRV’s setpoint under zero demand. Attach the gauge to a hose bib, turn on the bib, and wait for the needle to stabilize.
Dynamic (flowing) pressure is measured while one or more fixtures are open. This reading will always be lower than static. The difference between the two is called pressure fall-off, and it varies by valve size, pipe diameter, and total flow rate.
Pro Tip: For a useful homeowner baseline, test at the first-floor hose bib or washing machine cold-water inlet. These locations give you a reading close to the PRV’s actual output without the elevation correction needed for upper floors.
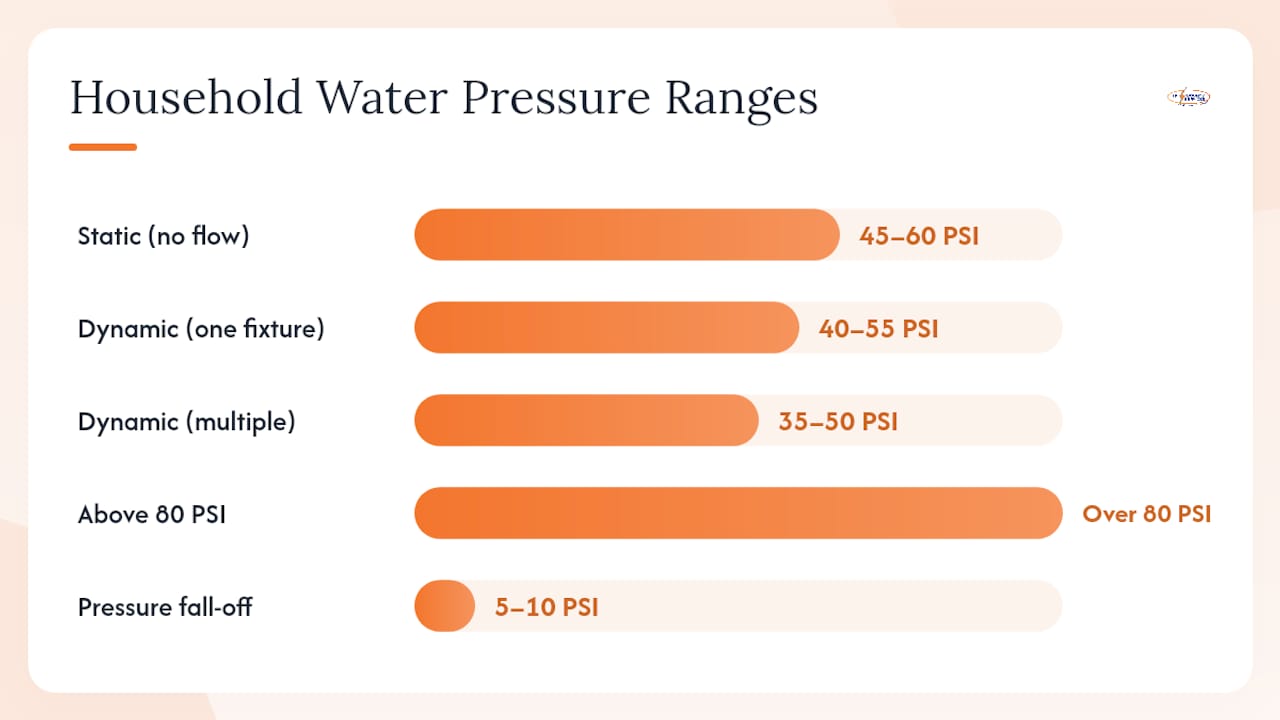
| Condition | Typical reading | What it tells you |
|---|---|---|
| Static (no flow) | 45–60 PSI | PRV setpoint; compare to your target |
| Dynamic (one fixture open) | 40–55 PSI | Normal fall-off; 5–10 PSI drop is common |
| Dynamic (multiple fixtures) | 35–50 PSI | Higher fall-off; check valve sizing if very low |
| Above 80 PSI (static) | Over 80 PSI | Code trigger; PRV required or needs adjustment |
What do common PRV problems look like after adjustment?
An adjustment that goes wrong usually announces itself within a few hours. Here is what to watch for and what each symptom typically means.
Common symptoms:
- Pressure creep (static reading climbs after adjustment) often points to thermal expansion in a closed system
- Fluctuating gauge readings under steady demand suggest a failing diaphragm inside the valve
- Water hammer (banging pipes) after adjustment can mean pressure is still too high or that the adjustment was made too quickly
- Leaking at the valve body after adjustment usually means the valve was already compromised before you touched it
| Symptom | Likely cause | DIY check | Call a pro when |
|---|---|---|---|
| Pressure creep | Thermal expansion or worn diaphragm | Check for closed system; verify no backflow device without expansion tank | Pressure keeps rising after re-adjustment |
| Water hammer | Pressure too high or fast-closing valves | Re-check static reading; lower setpoint slightly | Pipes move visibly or joints show stress |
| Leaking at valve | Worn seat or cracked body | Tighten packing nut gently | Any active drip that does not stop |
| Low flow at fixtures | PRV set too low or undersized valve | Raise setpoint by 5 PSI and re-test | Flow stays low above 50 PSI setpoint |
| Fluctuating pressure | Diaphragm failure | Watch gauge for 10 minutes under steady flow | Needle swings more than 10 PSI unpredictably |
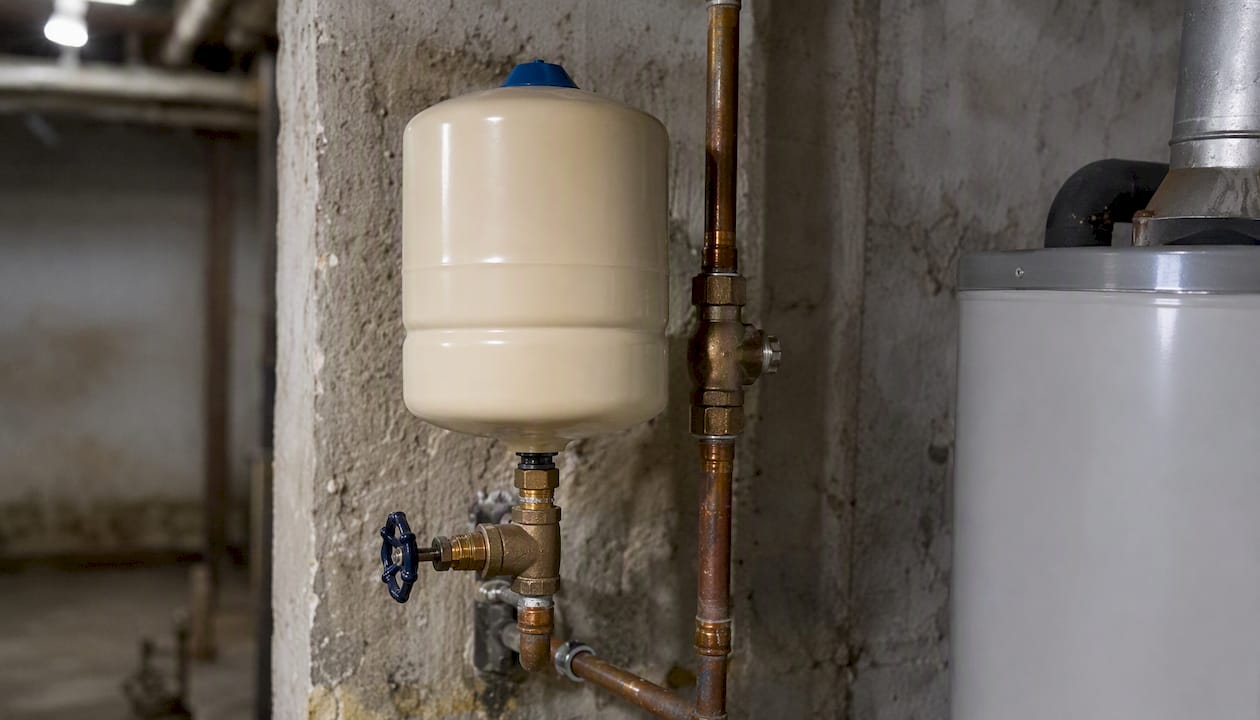
Pro Tip: Thermal expansion is the hidden cause behind many “mysterious” pressure spikes. When a water heater heats a tank in a closed system (PRV on the supply side, backflow preventer on the meter), the expanding water has nowhere to go. Pressure climbs past the PRV setpoint because the PRV only controls incoming pressure, not pressure generated inside the system. A thermal expansion tank, installed on the cold-water supply near the heater, is the correct fix.
If symptoms persist or worsen, the signs you need emergency plumbing service checklist is worth a quick read before the situation escalates.
How do you maintain a PRV and know when to replace it?
A PRV that gets no attention typically lasts 10–15 years, though hard water and high sediment loads shorten that considerably. Annual checks take less than 20 minutes and catch most problems before they become expensive.
Annual maintenance checklist:
- Attach a gauge and record the static pressure reading
- Open a downstream fixture and note the flowing pressure; compare to last year’s reading
- Inspect the valve body for corrosion, mineral scale, or weeping water
- Check the strainer screen (if your model has one) and flush or clean it
- Cycle the valve through a small adjustment and back to confirm the screw moves freely and the lock nut holds
Signs it is time to replace the valve:
- Pressure fluctuates unpredictably even after re-adjustment — a classic sign of diaphragm failure
- The adjustment screw no longer holds its position (lock nut stripped or spring worn)
- Visible corrosion on the valve body or fittings that goes deeper than surface rust
- The valve is more than 15 years old and has never been serviced
- Pressure consistently reads above 80 PSI despite correct adjustment attempts
Some PRV models allow a cartridge replacement rather than a full valve swap. This is worth asking about when you call a plumber, since it can cut both parts cost and labor time. Full replacement is the right call when the valve body itself is corroded or when the model is discontinued and cartridges are unavailable.
What does a professional plumber actually do for PRV work?
A professional plumber brings tools and diagnostic methods that go beyond a hose-bib gauge. Digital pressure loggers can record pressure over 24–48 hours, catching spikes that a single static reading misses entirely. Flow testing characterizes how the valve performs across the full demand range of your home, not just at one fixture.
Professional diagnostic and service scope:
- Digital pressure logging to capture overnight thermal expansion spikes
- Inlet pressure characterization to determine the actual ratio and whether staging is needed
- Code and permit review for jurisdictions requiring inspection on PRV replacement
- Installation of a thermal expansion tank when a closed system is confirmed
- Staged PRV installation when inlet pressure makes a single valve impractical
- Full valve replacement with correct sizing for your pipe diameter and flow requirements
Pro Tip: PRV sizing matters more than most homeowners realize. A valve sized for a 3/4-inch line installed on a 1-inch supply will create a pressure drop under high demand that no amount of adjustment will fix. A professional measures the pipe, calculates peak flow demand, and selects the correct valve body size before ordering parts.
PRV replacement parts and labor costs vary by valve size, access difficulty, and whether related work (expansion tank, permit) is needed. A straightforward residential PRV swap in Northeast Ohio typically involves the valve itself, fittings, and labor for the service call. Tri-County Services Electric & Plumbing can give you an accurate quote after a diagnostic visit.
Key Takeaways
Setting your PRV to 50 PSI (within the 45–60 PSI range) protects fixtures, satisfies U.S. code requirements, and extends appliance life across your entire plumbing system.
| Point | Details |
|---|---|
| Target setpoint | Set to 50 PSI as a practical target; keep within 45–60 PSI per EPA WaterSense guidance. |
| Code trigger | U.S. plumbing codes require a PRV when incoming pressure exceeds 80 PSI. |
| Adjustment direction | Clockwise raises pressure; counterclockwise lowers it. Always re-test under flow. |
| Call a pro first | Corrosion, leaks, unknown valve type, or inlet-to-outlet ratio above 3:1 all require professional service. |
| Tri-County Services | Tri-County Services Electric & Plumbing handles PRV diagnostics and replacement in Northeast Ohio. |
The part most guides skip
Most PRV articles treat adjustment as the default first step. The honest answer is that for most homeowners, calling a professional plumber first is the smarter move, not because the adjustment itself is complicated, but because what you find when you open the mechanical room often is.
A valve that has been running at 90 PSI for eight years is not just a setpoint problem. The diaphragm is likely worn, the strainer is probably clogged, and there is a real chance the valve body has stress fractures you cannot see until water is running. Adjusting that valve gives you a false sense of control while the underlying problem continues.
The other thing guides understate is thermal expansion. Homeowners install a PRV, set it correctly, and then watch their pressure gauge climb back above 80 PSI within a few hours. They assume the adjustment failed. What actually happened is that the water heater heated a closed system with nowhere to vent. No amount of PRV adjustment fixes that without an expansion tank.
The tools and steps in this article are real and useful. But the most valuable thing you can do before touching the valve is spend five minutes honestly assessing whether what you are looking at is a simple adjustment or a valve that has been overdue for replacement since the previous owner lived there.
Tri-County Services Electric & Plumbing handles PRV work in Northeast Ohio
Pressure problems rarely stay contained to one valve. When Tri-County Services Electric & Plumbing visits a home for a PRV diagnostic, the team checks inlet pressure, tests static and flowing conditions, inspects for thermal expansion risk, and reviews the full supply line for related issues. That is a different outcome than a single gauge reading and a quarter-turn on the adjustment screw.

Tri-County Services has served Northeast Ohio homeowners since 1975. The plumbing team brings the same safety-first approach to PRV work that the electrical team applies to panel upgrades: assess the full system, fix the actual problem, and document the work. If your pressure readings are off, your valve is aging, or you just want a professional set of eyes before attempting an adjustment, contact Tri-County Services Electric & Plumbing to schedule a service visit.
Useful sources
The sources below are worth bookmarking before you start any PRV work. Each one covers a specific piece of the puzzle.
- WaterSense Labeled Homes Technical Sheet: Service Water Pressure
- How to Adjust Water Pressure with a WPRV
- Installation, Operation & Maintenance Instructions Pressure Reducing Valve MODEL PRC (36C SERIES)
- Pressure reducing valves – Installation, commissioning and servicing instructions 533HS AUS
- Installation Instructions Tomson Pressure Reducing Valve
- How to Adjust Water Pressure
- The essential guide to pressure reducing valves
- Pressure-Reducing-Valve Information PDF
| Source | Best for |
|---|---|
| EPA WaterSense Technical Sheet | Confirming the 45–60 PSI target and code thresholds |
| Watts WPRV Instructions | Step-by-step adjustment procedure for Watts-brand valves |
| Caleffi 533HS Manual | Inlet-to-outlet ratio limits and staging guidance |
| Town of Lyons PRV PDF | Municipal rebate and setpoint compliance examples |
| Aalberts IPS Essential Guide | Understanding PRV mechanics and common DIY mistakes |
FAQ
What should a pressure reducing valve be set at?
Set a residential PRV to 50 PSI as a practical target, keeping it within the 45–60 PSI range recommended by the EPA WaterSense program. Most U.S. plumbing codes require a PRV when incoming pressure exceeds 80 PSI.
Is 70 PSI too high for home water pressure?
70 PSI is above the recommended 45–60 PSI range and begins to accelerate wear on fixture seals and water heater connections. Adjusting the PRV down to 50–60 PSI is advisable before sustained high pressure causes silent damage.
What is the pressure reducing valve set to from the factory?
Factory settings vary by manufacturer and model. Many residential PRVs ship preset to approximately 50 PSI, though some models (including certain Tomson valves) are factory-set closer to 50–72 PSI. Always verify with a gauge after installation rather than relying on the factory setting.
When does a pressure reducing valve need to be replaced rather than adjusted?
Replace the valve when pressure fluctuates unpredictably despite correct adjustment (diaphragm failure), when the adjustment screw no longer holds position, when corrosion penetrates the valve body, or when the valve is more than 15 years old without prior service.