

Yes, most homeowners can handle doorbell installation themselves, but the scope of the job decides everything. Swapping in a battery-powered wireless doorbell is almost always a DIY-friendly weekend task. Replacing an existing wired button with a new wired or smart doorbell is often doable too, as long as your transformer and chime are already compatible. New wiring runs, transformer swaps, or panel work are a different story entirely, and that’s where a professional electrician from Rossmoor needs to take over.
Before you touch anything, run through three checks: shut off the breaker feeding the doorbell circuit, test the wires with a voltage tester to confirm the power is actually dead, and check your Wi-Fi signal strength at the door if you’re installing a smart or video model. Skip any of those and you’re gambling with a shock hazard or a doorbell that never connects.
- Battery/wireless doorbell: DIY, typically 15 to 30 minutes.
- Wired button replacement with compatible transformer: DIY, roughly 30 to 60 minutes.
- New wiring, transformer replacement, or panel work: call a professional.
Pro Tip: If your existing doorbell chime hasn’t worked right in years or you’re not sure where your transformer even is, stop and call Tri-County Services Electric & Plumbing at (440) 253-0332 before you start pulling wires.
Table of Contents
- What Tools and Safety Steps Do You Need First?
- How Do You Install a Wired Doorbell Step by Step?
- How Do You Install a Wireless or Battery-Powered Doorbell?
- What Determines Transformer, Chime, and Wi-Fi Compatibility?
- How Do You Test and Troubleshoot a New Doorbell Installation?
- When Should You Call a Professional Instead of DIY?
- How Do You Replace a Mechanical Chime With an Electronic One?
- How Does a Smart Doorbell Fit Into Home Automation?
- How Do You Maintain the Battery in a Wireless Doorbell?
- What Should You Take Away From This Guide?
- Doorbell Installation Made Safe and Simple: My Take
- Get Professional Help With Your Doorbell Wiring
- Sources
- FAQ
What Tools and Safety Steps Do You Need First?
Doorbell installation goes smoother when you gather everything before you start rather than making three trips to the garage mid-project. You’ll need a non-contact voltage tester or multimeter, a drill with masonry and wood bits depending on your siding, wire strippers, a small level, plastic anchors, and a sturdy ladder if your doorbell sits above reach. Smart doorbells also need a charged battery pack (if applicable) and your phone with the manufacturer’s app already downloaded.
- Find the breaker that controls your doorbell circuit and switch it off. Many homes don’t label this clearly, so test by trying the existing doorbell button first.
- Confirm power is dead using your voltage tester directly on the exposed wires, not just by trusting the breaker label.
- Measure your preferred mount height and check it against the manufacturer’s recommended range.
- Stand at the door and check your phone’s Wi-Fi signal. A weak connection here means a weak connection for your video doorbell later.
- Read the manufacturer’s install guide for your specific model before drilling a single hole.
Installation timelines vary quite a bit by project type. Basic wireless installs run 15 to 30 minutes, while replacing a wired doorbell typically takes 30 to 60 minutes, and that gap widens fast once new wiring or a transformer swap enters the picture.
How Do You Install a Wired Doorbell Step by Step?
Wired doorbell installation, whether you’re putting in a basic mechanical unit or a wired smart doorbell, follows a fairly consistent sequence. The details differ slightly by brand, but the core steps below apply broadly across most systems.
- Switch off the breaker and verify with your voltage tester that the wires at the doorbell button are dead.
- Remove the old doorbell button from the wall, unscrew the two wire terminals, and pull the button free. Tape the bare wire ends together temporarily so they don’t fall back into the wall.
- Locate your transformer, usually mounted near the furnace, in a basement junction box, or behind an existing chime unit.
- Test the transformer’s output with your multimeter. Arlo specifies a working range of 8 to 24VAC with a minimum of 10VA for its hardwired doorbell, and most smart doorbell brands sit in a similar band.
- Mount the new doorbell’s bracket, feeding the two wires through the back opening.
- Attach the front and back wires to their labeled terminals, usually marked “front” and “trans” or similar, tightening each screw firmly.
- Screw the doorbell unit onto the mounting bracket and reinstall any included security screws.
- Restore power at the breaker.
- Press the doorbell button to confirm the chime sounds and, for smart models, follow the app to finish pairing.
Some installs need one more piece: a chime connector, sometimes called a Pro Power Kit. Digital chimes and certain smart doorbells draw more current than a mechanical chime alone can handle, so the kit sits inline to regulate power. Ring’s installation guidance specifically calls for a Pro Power Kit or plug-in adapter when your existing chime can’t supply enough current, and skipping this step is one of the top reasons smart doorbells reboot randomly or lose power intermittently.
If the doorbell doesn’t ring after you restore power, work through these before assuming the unit is defective:
- Recheck that both wires are seated fully under their terminal screws, not just resting against them.
- Retest transformer voltage under load; a reading that looked fine with nothing connected can sag once the doorbell draws power.
- Confirm the chime unit itself is compatible with a digital doorbell and not just an old mechanical model.
- Check the app for a firmware update that may be blocking the final pairing step.
Pro Tip: Take a photo of the old wiring and terminal labels before you disconnect anything. It takes ten seconds and saves you a frustrating guessing game later.
How Do You Install a Wireless or Battery-Powered Doorbell?
Wireless doorbell installation skips the electrical risk almost entirely, which is exactly why it’s the most beginner-friendly option on this list. There’s no breaker to shut off and no transformer to test, just a battery, a bracket, and an app.
- Charge the battery fully before mounting. Most units take two to four hours on the included cable, and installing on a dead battery just means an extra ladder trip later.
- Choose your mount height, generally 48 to 52 inches from the ground, and check the Wi-Fi signal at that exact spot using your phone.
- Hold the mounting bracket level, mark your screw holes, and drill pilot holes sized for your included anchors.
- Secure the bracket, then snap or screw the doorbell unit into place.
- Open the manufacturer’s app, create an account if you haven’t already, and scan the QR code or enter the serial number printed on the device or box.
- Set your motion detection zones so the doorbell isn’t triggered by passing cars or a neighbor’s dog every twenty minutes.
- Test the live view feed and trigger a motion event to confirm push notifications arrive on your phone.
Renters or anyone hesitant to drill into siding have another option worth knowing about:
- No-drill adhesive mounts work for many battery doorbells, though they’re less secure in extreme heat or cold.
- Door-frame or wedge mounts angle the camera without any permanent hardware.
- Test adhesive strength for 24 hours before trusting it with an expensive device outdoors.
What Determines Transformer, Chime, and Wi-Fi Compatibility?
Three compatibility checks decide whether your doorbell installation stays a DIY project or needs a professional. Skip these and you’ll likely end up troubleshooting a doorbell that seems broken but is actually just underpowered or poorly connected.
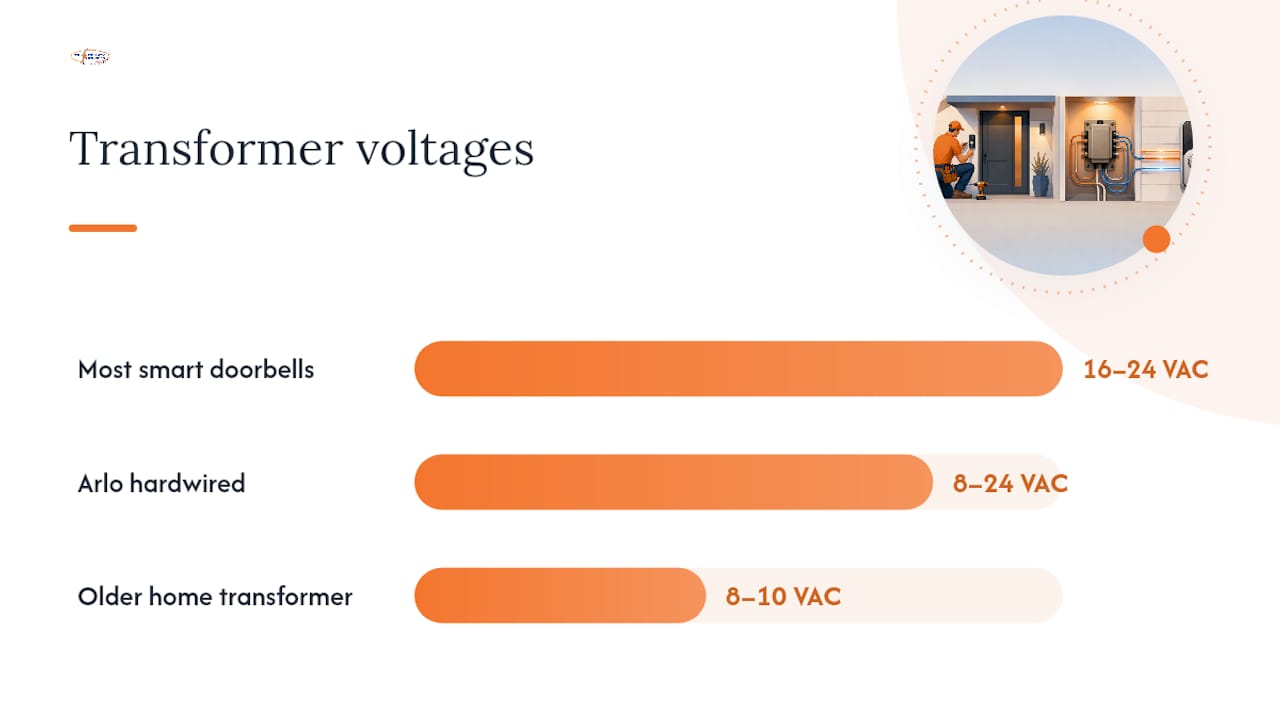
Transformer voltage matters most for smart and video doorbells, which draw meaningfully more current than a basic mechanical button. Most smart doorbells expect somewhere in the 16 to 24VAC range, though Arlo’s hardwired doorbell accepts a slightly wider 8 to 24VAC window. Older homes frequently have 8 to 10VAC transformers built for a simple mechanical chime decades ago, and those units often can’t keep a smart doorbell powered reliably even if the initial test looks acceptable.
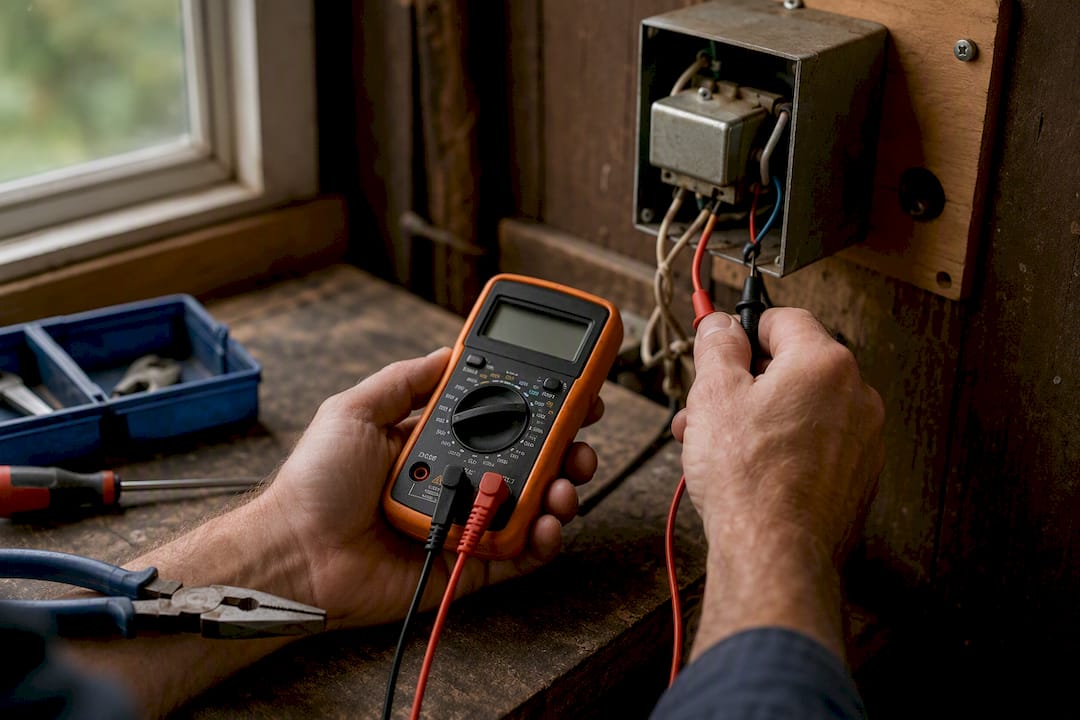
Chime compatibility splits into two camps: mechanical chimes (the classic “ding dong” with physical chimes struck by a solenoid) and digital chimes (electronic units that play a sound file). Digital chimes and video doorbells sometimes need a bypass or connector kit wired in between to avoid overloading the circuit, and most manufacturer apps walk you through configuring the chime type once connected.
Wi-Fi signal strength rounds out the checklist. A door mounted at the far end of the house from your router is a common reason video doorbells drop connection or lag on live view. If your signal test at the door looks weak, a mesh network node or Wi-Fi extender near the entry solves it faster than fighting with the doorbell itself.
- Test transformer voltage with the doorbell disconnected and again under load.
- Identify your chime type before ordering a smart doorbell that requires a specific connector.
- Run a speed test at the door location, not just inside your living room.
Mounting and Weatherproofing Across Different Surfaces
The surface behind your doorbell changes your approach more than most homeowners expect. Wood siding takes standard wood screws directly. Vinyl siding needs the included spacer or wedge kit so the camera doesn’t tilt downward. Stucco and brick require masonry bits and anchors rated for the doorbell’s weight, and rushing this step is how doorbells end up crooked or loose within a year.
- Seal around the cable entry point with silicone caulk to keep water out of the wall cavity.
- Use the gasket included with most smart doorbells between the unit and the mounting surface.
- Angle the camera slightly downward if your porch has an overhang, so faces aren’t washed out by shadow.
Pro Tip: Mount at a height that catches faces at chest level, not shoetops. Most missed package detections come from a doorbell aimed too low or too high, not a bad camera.
How Do You Test and Troubleshoot a New Doorbell Installation?
Work through the system in order rather than jumping straight to the app, since most doorbell problems trace back to something simple earlier in the chain.
- Confirm power first: restore the breaker and verify voltage at the doorbell terminals with your tester.
- Check the physical wiring: loose terminal screws are the single most common reason a newly installed doorbell doesn’t ring.
- Test the chime: press the button and listen for the mechanical strike or digital tone.
- Open the app: confirm the doorbell shows as online and check for a pending firmware update.
- Recheck Wi-Fi: a doorbell that pairs but drops offline minutes later usually points to a weak signal, not a defective unit.
Most failures fall into a short list: a terminal screw that isn’t fully tightened, a transformer delivering under the recommended voltage range, a chime setting misconfigured in the app, or a router that simply needs a reboot. Correct wiring, power, and mounting directly affect video quality and detection reliability, so a doorbell that connects but produces grainy footage or missed alerts often has an installation issue at its root, not a hardware defect.
If you’ve worked through every step above and the doorbell still won’t hold power or the transformer reads well outside its rated range, that’s a wiring problem, not a settings problem, and it’s time to call in a professional rather than keep guessing.
When Should You Call a Professional Instead of DIY?
Certain situations turn a simple doorbell installation into an electrical project that shouldn’t be handled without training. If your home has no existing doorbell wiring at all, you’re not swapping a part, you’re running new circuit wiring from scratch, and that work belongs with a professional. The same goes for transformer replacement: The Home Depot’s own installation guide recommends calling a qualified electrician specifically for transformer work, since it involves connecting to line voltage rather than the low-voltage doorbell circuit.
Watch for these red flags:
- No existing doorbell wiring anywhere near your entry.
- A transformer that tests well outside the safe range even after multiple checks.
- Brittle, cracked, or old cloth-wrapped wiring inside the wall.
- Masonry routing that requires opening a wall cavity rather than a simple surface mount.
- Any work that touches your electrical panel or requires a permit in your municipality.
Homeowners often underestimate how much hidden complexity sits behind an old doorbell button, from underpowered transformers to brittle wiring that was never meant to carry a modern current load. A professional handles the parts DIY tools can’t reach safely: sizing and installing the correct transformer, tidy wire routing into a proper junction box, chime integration that actually matches your new doorbell, and weatherproofing that holds up through Ohio winters. Tri-County Services Electric & Plumbing has been solving exactly these problems for Northeast Ohio homes since 1975, and our technicians test voltage under load rather than guessing from a single reading.
Pro Tip: If you’ve already opened the wall and found wiring you don’t recognize or trust, stop there. Call Tri-County Services Electric & Plumbing at (440) 253-0332 before closing anything back up.
How Do You Replace a Mechanical Chime With an Electronic One?
Swapping a mechanical chime for an electronic model is a common step when upgrading to a smart doorbell, since many digital doorbells need a chime that can handle a different current draw. Start by killing power at the breaker and confirming with your voltage tester, the same as any other doorbell work.
Remove the cover of your existing mechanical chime unit to expose the wiring terminals, typically labeled “front,” “rear,” and “trans.” Take a photo before disconnecting anything, since electronic replacement chimes use the same three-terminal layout but the wire colors won’t necessarily match. Disconnect each wire one at a time and connect it to the corresponding terminal on the new electronic chime unit.
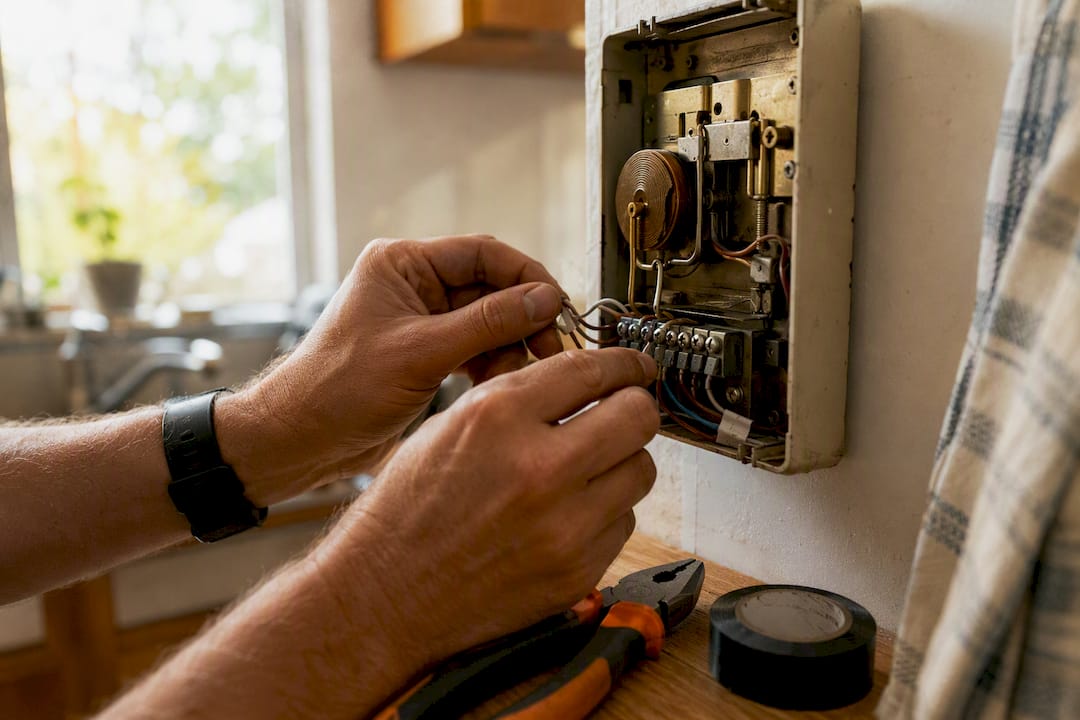
Mount the new chime in the same location if the mounting holes align, or patch and remount nearby if they don’t. Electronic chimes are lighter than the mechanical bell-and-hammer units they replace, so standard drywall anchors usually suffice indoors.
Restore power and test the chime by pressing your existing doorbell button first, confirming the tone plays correctly, before pairing your new smart doorbell to it. Most smart doorbell apps include a setting to select “digital chime” or “mechanical chime,” and choosing the wrong option is a frequent cause of chimes that either don’t sound or buzz continuously. If the new chime doesn’t respond at all after wiring is confirmed correct, the issue is often an underpowered transformer rather than the chime itself, which loops back to the compatibility check covered earlier.
How Does a Smart Doorbell Fit Into Home Automation?
Most smart and video doorbells connect into a broader smart home setup once the basic pairing is done, and this step is where a lot of the real value shows up day to day. Voice assistant integration typically happens inside the doorbell’s own app: look for an “integrations” or “works with” menu and link your Amazon Alexa or Google Assistant account from there.
Once linked, you can ask your voice assistant to show the doorbell feed on a compatible smart display or television, or set up an automated announcement that plays inside the house when motion is detected at the door. Some ecosystems also let the doorbell trigger other devices, like turning on porch lights automatically after dark when someone approaches.
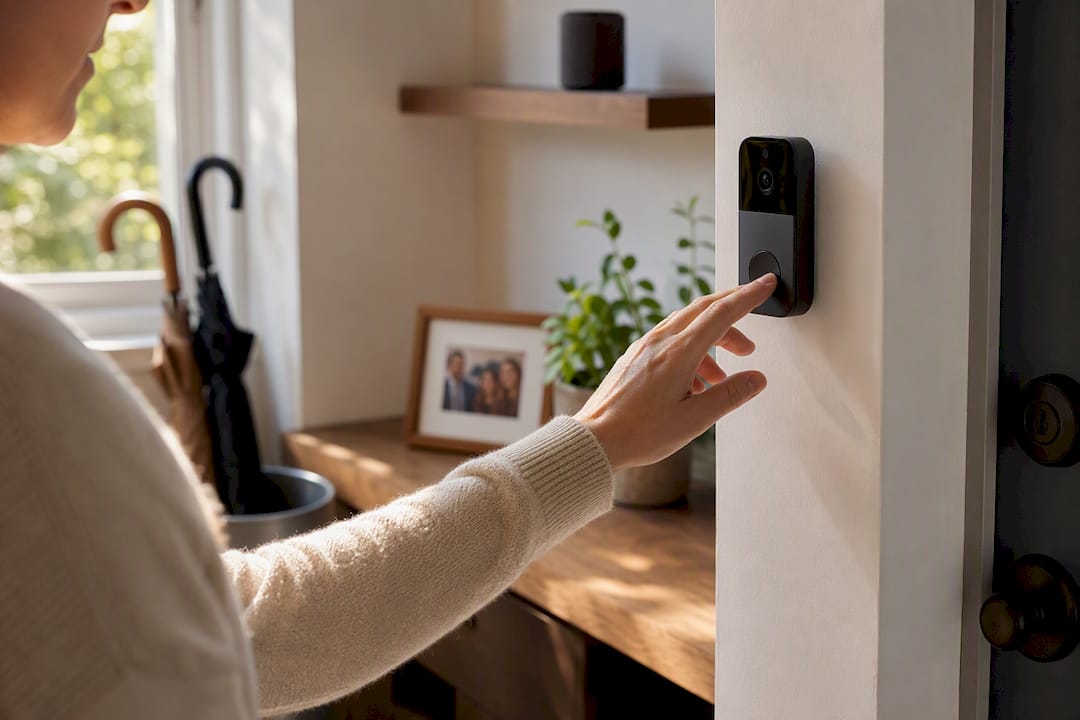
A few practical notes make this integration smoother. Keep your doorbell app and firmware updated, since voice assistant compatibility is frequently added or improved through software updates rather than new hardware. Assign the doorbell a clear, distinct name in the app (“Front Door” rather than the default model number) so voice commands and automations work naturally. And if you’re running multiple smart home devices on the same Wi-Fi network, a doorbell with a live video feed is one of the more bandwidth-hungry devices in the house, so weak Wi-Fi that seemed tolerable for a smart plug can bottleneck a doorbell’s video stream noticeably.
How Do You Maintain the Battery in a Wireless Doorbell?
Battery-powered doorbells trade wiring hassle for a different kind of maintenance: keeping the battery charged and healthy over time. Most rechargeable doorbell batteries last anywhere from one to six months per charge depending on usage, temperature, and how often motion detection triggers a recording.
Cold weather is the biggest drain on doorbell batteries, and Northeast Ohio winters will noticeably shorten the interval between charges compared to summer months. If your doorbell’s battery seems to drain unusually fast, check your motion sensitivity settings first. A zone set too wide or too sensitive means constant recording, and constant recording means constant battery use.
A few habits extend battery life meaningfully:
- Charge the battery fully before reinstalling it rather than topping off a partial charge repeatedly.
- Narrow motion detection zones to your porch and walkway rather than the whole street.
- Bring the battery pack indoors during extreme cold snaps if your model supports a removable battery.
- Replace the battery entirely, rather than just recharging, once you notice it’s holding a charge for a fraction of what it used to. Most lithium batteries in these devices are rated for a few hundred charge cycles before capacity drops noticeably.
Some smart doorbells now offer a wired-and-battery hybrid setup, where the low-voltage wiring trickle-charges the battery continuously. If your home already has doorbell wiring, this option removes the recharging chore entirely and is worth asking about when choosing a replacement unit.
What Should You Take Away From This Guide?
Doorbell installation is safe DIY territory for wireless models and straightforward wired swaps, but transformer, wiring, and panel work call for professional judgment every time.
| Point | Details |
|---|---|
| Match the job to your skill level | Wireless swaps and compatible wired replacements are DIY friendly; new wiring or transformer work is not. |
| Test before you trust | Always verify voltage with a tester rather than assuming the breaker label or old wiring is accurate. |
| Voltage range matters | Most smart doorbells need roughly 16 to 24VAC, and older transformers often fall short of that. |
| Sealing prevents failure | Silicone and gaskets around cable entries stop water intrusion that ruins doorbell electronics. |
| Call Tri-County Services Electric & Plumbing for the hard parts | For new wiring, transformer replacement, or brittle old wiring, Tri-County Services Electric & Plumbing handles the electrical work safely at (440) 253-0332. |
Manufacturer and Authoritative Install Pages Worth Bookmarking
Manufacturer support pages remain the best source for model-specific connector types, exact power specs, and app pairing steps, since they’re written directly for your device.
- Google Nest’s install guide covers wired setup, transformer checks, and app troubleshooting.
- Ring’s installation support page details Pro Power Kit use and chime configuration.
- The Home Depot’s install walk-through offers broader mounting and transformer guidance across brands.
Doorbell Installation Made Safe and Simple: My Take
The conventional DIY advice on doorbell installation treats every wired swap as equally simple, and that’s where I think most guides get it wrong. Replacing a button with an identical transformer and chime is genuinely easy. But the moment your transformer reads outside spec or your chime is a decade-old mechanical unit paired with a new smart doorbell, you’re no longer doing a swap. You’re troubleshooting a mismatched electrical system, and that’s a different job entirely.
What gets underestimated most is the transformer. It’s the one component homeowners skip testing because it’s hidden in a basement junction box, yet it’s the most common reason a “properly installed” smart doorbell reboots, loses power, or shows a chime that won’t cooperate. If you take one thing from this guide, test the transformer under load, not just at rest, before you trust it with a new device.
Where the wiring looks unfamiliar or the readings don’t match spec, that’s the moment to stop and call a professional rather than push forward on a guess. Tri-County Services Electric & Plumbing can be reached at (440) 253-0332 for exactly that kind of diagnosis.
— Lindsay Paramore
Get Professional Help With Your Doorbell Wiring
There are other routes when a doorbell project turns into an electrical headache: a general handyman, a big-box retailer’s install service, or just muscling through it yourself with a search engine open on your phone. None of those give you a licensed technician who tests your transformer under actual load, traces old wiring back to its source, and leaves you with a clean, code-aware installation instead of a workaround.

Tri-County Services Electric & Plumbing has served Northeast Ohio homeowners since 1975, and our technicians handle exactly the situations this guide flags as too risky for DIY: transformer replacement, new wiring runs, brittle old circuits, and anything touching your electrical panel. We also cover the broader electrical repair work that often surfaces once a wall is opened up for a doorbell project. If your transformer tested outside spec, your wiring looked questionable, or you’d simply rather not risk it, call our office at (440) 253-0332 to schedule an appointment, or check out our residential electrical services to see the full range of what we handle beyond doorbells.
Sources
- Install Nest Doorbell (wired) – Google Nest Help
- Installing Wired Doorbell Pro – Ring support
- How to Install a Doorbell – The Home Depot
- Ding-Dong! Here’s the Right Way to Install a Doorbell Camera | Reviews by Wirecutter
FAQ
Do You Need an Electrician to Install a Doorbell?
Not for a simple wireless doorbell or a wired swap using an existing, compatible transformer and chime. You do need a professional for new wiring, transformer replacement, or panel work.
How Much Does It Cost to Install a Doorbell?
Costs vary by whether you’re doing it yourself or hiring out, and by whether transformer or wiring work is involved; DIY wireless installs cost only the price of the doorbell itself, while jobs requiring a professional add labor for wiring or transformer work.
Can I Install a Wireless Doorbell Myself?
Yes. Wireless and battery-powered doorbells involve no electrical wiring, just charging the battery, mounting the bracket, and pairing the device through the manufacturer’s app, typically in 15 to 30 minutes.
How Much Do Electricians Charge to Install a Doorbell?
Rates depend on the scope of work, whether it’s a simple transformer swap or a full new wiring run, and vary by region and project complexity. Call Tri-County Services Electric & Plumbing at (440) 253-0332 for a quote specific to your situation.
What Voltage Should a Doorbell Transformer Read?
Most smart doorbells need roughly 16 to 24VAC, though some models like Arlo’s hardwired doorbell accept a range as low as 8VAC. Test with a multimeter, and if readings fall outside your device’s specified range, the transformer likely needs replacement.