

Yes, you can install Ethernet cable yourself for simple surface or attic runs, but complex in-wall, multi-floor, or PoE++ jobs call for a professional. Start by mapping your endpoints and deciding which category your project falls into. Use solid Cat6 or Cat6a terminated to keystone jacks, and test every run before closing up a wall. If the scope grows beyond a weekend project, call Tri-County Services Electric & Plumbing at (440) 253-0332 before you start drilling.
TL;DR:
- Use Cat6 cable for most residential installations, and upgrade to Cat6a for future-proofing high-speed or 10-Gigabit needs; avoid Cat5e for in-wall runs.
- Always plan your layout on paper, selecting a central hub location and marking endpoint locations to ensure proper spacing, slack, and future accessibility.
- For in-wall runs, drill through studs with firestop considerations, avoid sharp bends, and never staple directly through the cable jacket to prevent damage.
- Terminate cables on keystone jacks and patch panels with consistent standards, labeling and mapping every port to ensure reliable, long-term performance.
- Seek professional help if your installation crosses fire-rated walls, involves multiple floors, or if you plan to run PoE++ devices, to ensure safety, compliance, and certification.
Table of Contents
- What Tools and Materials Do You Need for an Ethernet Install?
- How Do You Plan Your Ethernet Cable Layout?
- Which Cable Type Should You Buy: Cat5e, Cat6, or Cat6a?
- How Do You Actually Run the Cable Through Your Walls?
- How Do You Terminate Ethernet Cable Correctly?
- How Do You Test and Document a New Ethernet Run?
- When Should You Hire a Professional Instead of DIY?
- Tri-County Services Electric & Plumbing: What a Professional Adds
- A Reflection on What DIY Ethernet Projects Get Wrong
- Get Professional Ethernet and Low-Voltage Wiring Done Right
- Sources
- FAQ
What Tools and Materials Do You Need for an Ethernet Install?
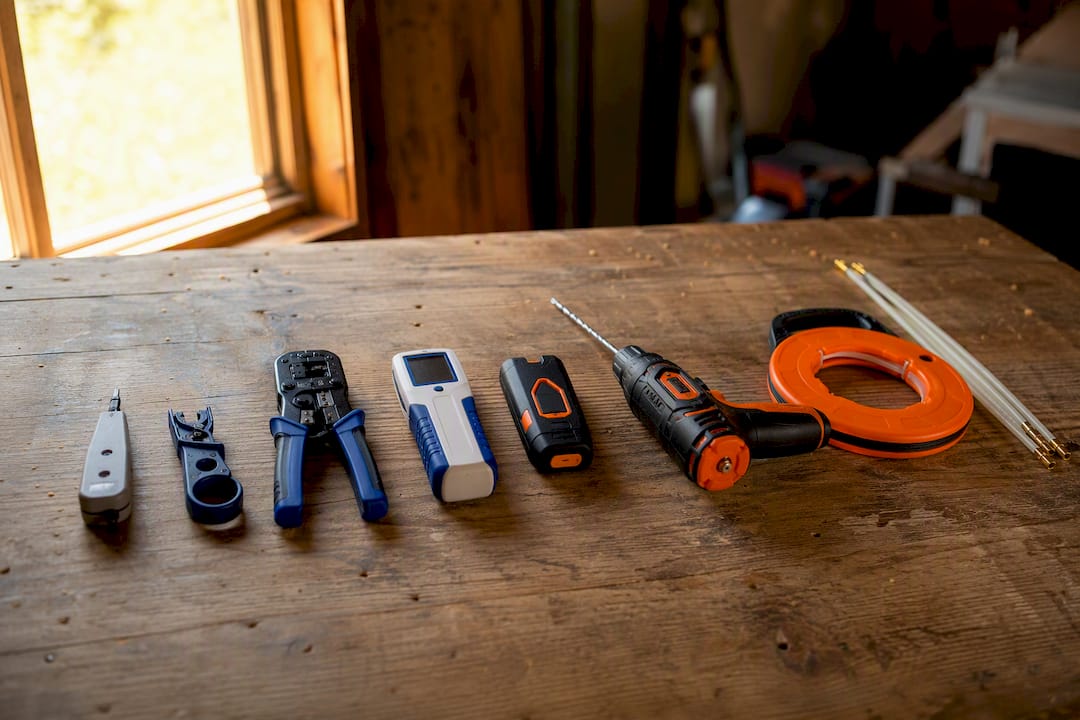
Before you pull a single foot of cable, lay out what the job actually requires. A punchdown tool, a cable stripper, a crimper for field plugs, a basic wiremap tester, a stud finder, and a drill with long bits covers most residential jobs. Fish tape or fiberglass rods help you pull cable through finished walls without tearing up drywall.
On the materials side, you’re choosing between solid and stranded copper, and the choice matters more than most people expect. Solid-core cable belongs in your walls as permanent horizontal wiring. Stranded cable is more flexible and better suited to short patch cords that get moved and flexed at the desk or rack. You’ll also need keystone jacks, a wall plate for each outlet, a small patch panel or structured media enclosure, and conduit with bushings anywhere cable passes through masonry or sharp metal edges.
A word on testers: a $30 wiremap tester confirms your pairs are wired correctly and catches shorts or opens. It won’t tell you if a run meets 10-Gigabit performance specs. Professionals carry certification testers that measure attenuation, crosstalk, and length against wire standards, which matters far more on long runs or Power over Ethernet installs than on a single office jack.
Basic tools and materials checklist:
- Cable stripper and punchdown tool (110-style blade works for most keystone jacks)
- RJ45 crimper, only needed if you’re making field patch cables
- Fish tape or rods for wall and conduit pulls
- Stud finder, drill, and long spade or auger bits for top-plate drilling
- Basic wiremap/continuity tester
- Safety glasses and a dust mask for attic and drywall work
Pro Tip: Buy your keystone jacks and patch panel from the same brand family. Punchdown depth and color coding vary slightly between manufacturers, and mixing brands is a common source of intermittent connection issues.
How Do You Plan Your Ethernet Cable Layout?
Every good installation starts on paper, not with a drill. Pick a central location for your patch panel or structured media enclosure first, ideally a closet or basement area near your internet entry point with power nearby. That location becomes the hub every run terminates back to, so it needs to be somewhere you can access easily for years, not just during installation week.
Prioritize rooms by actual need rather than convenience. A home office, a media center with a streaming box, and any spot where you’ll mount a wireless access point or security camera deserve a dedicated run over a coaxial splitter or a Wi-Fi extender.
- Walk the house and mark every endpoint on a floor plan, numbering each jack location.
- Choose your central enclosure location and confirm it has power and ventilation.
- Measure the distance from each endpoint to the enclosure, adding 20% for bends and vertical runs.
- Leave service loops at every termination point. Industry guidance recommends slack at wall jacks and patch panels, enough to allow re-terminations without re-routing(https://www.truecable.com/blogs/cable-academy/service-loops-discovering-purpose-placement-and-preparation), which lets you re-terminate a damaged end without pulling a whole new cable.
- Pull one or two spare cables or a length of pull string alongside each run for future upgrades.
- Build a simple labeling map now, before anything is hidden in a wall, matching jack numbers to patch panel ports.
Keep new low-voltage runs at least several inches from parallel electrical cable wherever your route allows it, and cross power lines at a right angle rather than running alongside them for any distance.
Which Cable Type Should You Buy: Cat5e, Cat6, or Cat6a?
Buy Cat6 for most residential jobs, and step up to Cat6a if you’re wiring a home office with heavy file transfers or planning for 10-Gigabit gear down the road. Cat5e still works, but it’s the wrong cable to bury in a wall you don’t want to open again in five years.
Cat5e supports Gigabit speeds over typical residential distances, which is fine for a guest bedroom or a basic streaming device. Cat6 handles Gigabit with more headroom and supports higher speeds over shorter distances. Cat6a is designed to support 10-Gigabit performance over longer residential runs, though it costs more and its thicker jacket makes it slightly harder to pull through tight conduit. Cat6 and Cat6a are commonly recommended for residential installations today(https://wolverinelowvoltage.com/blog/low-voltage-wiring/), with Cat6a specifically holding 10 Gbps over longer distances where Cat6 starts to fall off.
Key cable decisions for in-wall runs:
- Solid vs. stranded: solid copper for permanent horizontal cabling, stranded for patch cords.
- Plenum vs. non-plenum (riser/CMR): check your local fire code before running cable through air-handling spaces like drop ceilings or HVAC returns, since the National Electrical Code sets safety ratings for exactly this situation.
- Shielded (STP) cable: worth considering only if your run passes close to heavy electrical equipment, fluorescent ballasts, or industrial machinery, which is rare in most homes.
Statistic: Cat6a maintains its full 10 Gbps ceiling across longer residential distances than Cat6 does, which is the main reason installers now recommend it for any run feeding a home office or media closet built to last.
How Do You Actually Run the Cable Through Your Walls?
Routing cable is where most DIY installs go wrong, not because the concept is hard, but because the execution punishes shortcuts. Pick your method based on how finished your walls already are and how many floors the cable needs to cross.
- In-wall routing. Find your studs, drill through top or bottom plates with a long bit, and always install a bushing or grommet anywhere cable passes through metal or rough wood edges. Watch for fire-rated wall assemblies between units or floors. Drilling through one without proper firestop material is a code violation, not a shortcut.
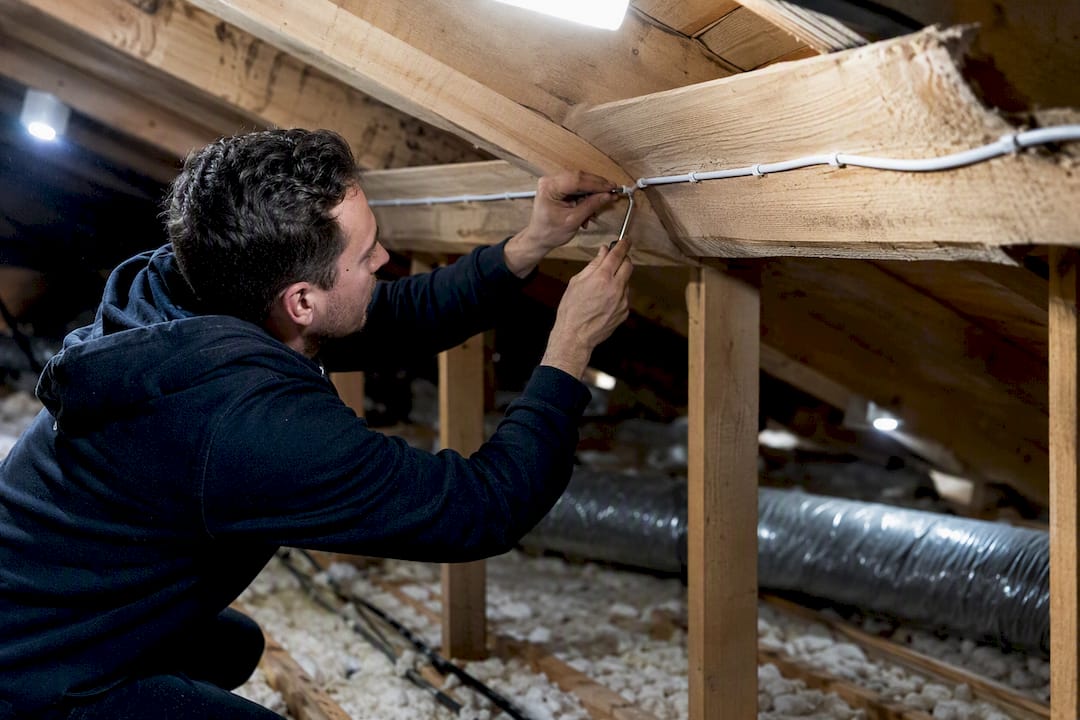
- Attic and above-ceiling runs. These are usually the easiest DIY option. Route cable along joists rather than draping it across insulation, keep it away from recessed lighting and HVAC ducts that generate heat, and secure it every few feet with cable staples rated for low-voltage wire so you’re not crushing the jacket.
- Surface raceway. For finished homes where opening walls isn’t an option, paintable raceway channels run along baseboards or up corners with minimal cosmetic damage. This is often the fastest path to a clean result without any drywall work at all.
- Conduit pulls. For exterior runs, unfinished basements, or garages, conduit protects the cable and makes future pulls easier. Use fish tape to guide cable through, and never force it.
- Multi-floor penetrations. Running cable between floors usually means drilling through top and bottom plates in aligned closets or utility spaces. This is one of the trickiest parts of a residential install, and it’s where fire-rated assembly rules most often come into play.
Throughout every method, respect the cable’s physical limits. Minimum bend radius for Ethernet cable should be at least several times the cable’s diameter to avoid damage, and cinching a cable tie too tight has the same effect as a sharp bend: it squeezes the pairs inside and degrades signal quality permanently, even though the cable looks fine from the outside.
Pro Tip: Never staple directly through the cable jacket. Use rounded cable staples or J-hooks that cradle the cable loosely, leaving room for it to expand slightly with temperature changes in an attic or garage.
If your project involves fire-rated assemblies, tight multi-floor chases, or any penetration you’re not fully confident sealing correctly, that’s the moment to call a professional instead of guessing.
How Do You Terminate Ethernet Cable Correctly?
Terminate permanent horizontal cable to keystone jacks on one end and a patch panel on the other. Industry best practice reserves RJ45 plugs for flexible patch cables, not for the wall-to-closet runs that make up your home’s actual network backbone, because plugs crimped directly onto solid-core cable are far more prone to failure under any flexing or tension.
Good termination habits make the difference between a network that works for a decade and one you’re troubleshooting every few months.
- Strip only as much jacket as needed to punch down each pair, keeping twisted pairs intact as close to the termination point as possible.
- Use the jack’s built-in strain relief to capture the outer jacket, not just the individual wires.
- Pick either T568A or T568B wiring standard and use it consistently across every jack and every patch panel port in the house. Mixing standards on the same run creates a crossover cable by accident.
- Reserve crimped RJ45 plugs for short, flexible patch cords between the wall jack and a device, not for anything buried in a wall or ceiling.
- Label both ends of every run the moment you terminate it, and map each port on the patch panel to its room and jack number.
How Do You Test and Document a New Ethernet Run?
Every terminated run needs testing before you consider the job done, no exceptions. A basic wiremap tester checks continuity, confirms polarity, and flags shorts or opens in seconds. Run this test on every single jack, even ones you’re confident about.
Beyond the wiremap check, plug in a laptop or test device and confirm the connection negotiates at the expected speed. Basic testing suffices for most residential jobs, though critical or high-speed links benefit from comprehensive certification testing rather than a basic continuity checker, since those applications are far less forgiving of marginal connections.
Testing and documentation checklist:
- Wiremap test on every jack (continuity, polarity, shorts/opens)
- Speed test at each endpoint using a laptop or network device
- Certification test for any 10G or PoE++ run
- Written port map linking jack numbers to patch panel ports and room names
- Dated test log kept with your home network documentation
Statistic: A significant share of “dead” Ethernet jacks in home networks trace back to reversed pairs or a loose punchdown rather than a bad cable, which is exactly what a $30 wiremap tester catches in under a minute.
If a run tests fine for continuity but the connection keeps dropping under load, that intermittent pattern often points to a bend radius violation or a bad splice hidden inside the wall, and it’s a strong signal to bring in a professional rather than re-terminating the same problem repeatedly.
When Should You Hire a Professional Instead of DIY?
Check your local building department before you drill into any fire-rated wall, ceiling assembly, or shared floor between units. Local ordinances and your authority having jurisdiction often set specific requirements for low-voltage wiring that go beyond general cable ratings, and skipping that check can mean redoing work later or failing an inspection during a home sale.
Homeowners consistently underestimate two things: how much a fire-rated penetration actually restricts their options, and how easily a tight cable tie or a sharp bend silently degrades a connection that tests fine on day one but fails under real load six months later.
Certain situations are simply outside reasonable DIY scope:
- Runs crossing multiple floors through fire-rated assemblies or shared walls between units
- Any installation feeding PoE++ powered devices, where electrical load and cable heat become real factors
- A run that tests fine for continuity but fails under sustained load or high-speed negotiation
- Uncertainty about whether your local code requires a permit or inspection for the work
Typical residential jobs, like wiring three or four rooms from a basement panel, run anywhere from a few hundred dollars to over a thousand depending on wall access, cable length, and how many drywall repairs the job requires. Attic-accessible homes with easy panel access finish faster and cheaper than older homes with plaster walls or finished basements blocking direct routes.
Tri-County Services Electric & Plumbing: What a Professional Adds
Tri-County Services Electric & Plumbing has served Northeast Ohio homeowners since 1975, and that history shapes how we approach even a “simple” cable run. We treat every low-voltage job with the same inspection discipline we apply to electrical panel work, because a data line sharing a wall cavity with power wiring is still an electrical safety question.
What a professional installation adds that most DIY jobs miss:
- Certified testing equipment for 10G and PoE++ links, not just a basic wiremap check
- Code and permit awareness for fire-rated penetrations and multi-floor runs
- Documented port maps and labeling handed over at project completion
- Scheduling that works around your household, not the other way around
- Experience with related low-voltage work, including phone, data, TV, and speaker installation and underground and exterior cable runs
A Reflection on What DIY Ethernet Projects Get Wrong
The mistake I see most often isn’t bad cable or a cheap tester. It’s homeowners rushing the planning step, then discovering halfway through a wall cavity that they’ve routed low-voltage cable directly against a power line, or drilled through a fire-rated assembly they didn’t know existed. Attic runs and surface raceway jobs are genuinely reasonable weekend projects. In-wall work crossing floors, or anything near a fire-rated wall, is where confidence outpaces knowledge fastest. If you’re staring at a wall you’re not sure about, that hesitation is worth listening to. Call a professional before you drill, not after.
— Lindsay Paramore
Get Professional Ethernet and Low-Voltage Wiring Done Right
There’s a real limit to what a weekend and a fish tape can safely accomplish, especially once your project involves multiple floors, fire-rated walls, or a home network built around PoE++ security cameras. Tri-County Services Electric & Plumbing brings the same inspection standards to a data cable run that we bring to a panel upgrade, so you get certified testing, documented port maps, and a job that passes a real code check instead of a guess.

We handle everything from a single home office jack to a full structured wiring closet, alongside the phone, data, TV, and speaker installation work many Northeast Ohio homes need. Our technicians work around your schedule and treat your home with the same care they’d want in their own. If your project has grown beyond a simple attic run, or you’re not sure whether a wall is fire-rated, don’t guess. Call Tri-County Services Electric & Plumbing at (440) 253-0332, or visit our residential electrical services page to schedule an assessment and get your network wired correctly the first time.
Sources
- Leviton basic residential installer guide
- Bend radius vs return loss — Ampcom
- RJ45 vs keystone jack — TSCables
FAQ
How Much Does It Cost to Have Ethernet Cable Installed?
Most residential jobs wiring three to four rooms from a central panel run from a few hundred dollars into the low thousands, depending on wall access, cable length, and drywall repair needs.
Do I Just Plug an Ethernet Cable Into My Router?
For a simple single-room connection, yes, you plug one end into your router or switch and the other into your device, but permanent in-wall runs need proper termination to keystone jacks and a patch panel for reliability.
Do I Need a Professional to Install Ethernet?
Not for basic attic or surface raceway runs, but you should call a professional for multi-floor penetrations, fire-rated wall assemblies, PoE++ installations, or any run near existing electrical wiring.
Is Ethernet Wiring Hard to Install?
Surface and attic runs are approachable for a careful DIYer with the right tools, but in-wall routing across floors, proper termination, and code compliance raise the difficulty enough that many homeowners choose to call Tri-County Services Electric & Plumbing at (440) 253-0332 instead.